STORES
One business, one or more store locations
A store represents a shop location in CASA. It ties together that location's inventory, invoices, orders, staff, scheduling, taxes, and operating preferences. A business with multiple locations can maintain each store's details and stock separately while working within CASA.
In the desktop Stores screen, search for a store to review or update it, or choose Clear / New to create one. Each saved store receives an ID. The Active setting and opened and closed dates help identify current and former locations; notes provide room for additional store information.
SET UP EACH DEVICE
Default store, stock, and taxes
Every CASA device should have its own default store selected in local Settings. Choose the active location where that desktop or Android device is used. It supplies the location for new invoices and commonly preselects the store for searches, orders, scheduling, and other work.
Inventory quantities shown in the normal inventory views are for the selected default store: another location may have different Available, Committed, On Order, or other quantities for the same model. CASA also has multi-store views and filters where you can review other locations.
A new invoice normally belongs to the device's default store. The invoice's store determines which store-configured taxes and fees can apply, together with the item-level assignments and any exemptions. Existing invoices retain their own store context; changing a device default does not change the store on an existing invoice. See taxes and line-item fees for the calculation.
IDENTIFY YOUR LOCATION
Contact details and printed documents
Set the store's name, phone numbers, address, email, and website. The name is required; CASA warns when the address is incomplete. Keep the details accurate so customers and suppliers know which location is serving them.
Printed invoices and estimates use the store name or configured invoice logo, along with available address, phone, and website details. A printed purchase order uses the store's name, address, phone, and email in its Ship To section. The store's general contact email is separate from the sender addresses configured for outgoing email.
Upload an invoice logo and choose normal or large print size. Without a logo, the store name appears instead. Store policy text can appear on invoices and receipts and when a customer adds a signature, helping communicate the location's terms.
SET YOUR SHOP'S RULES
Invoice and employee settings
- Allow anonymous clients: controls whether invoices can be created without identifying a customer. Turn it off when your shop wants every invoice linked to a client.
- Require phone or email: require the selected or newly created invoice client to have the corresponding contact information. These settings help your team find and contact the customer later.
- Committing invoice requires payment: requires a payment before committing an invoice with a nonzero total. It does not mean the entire balance must be paid before commitment; completion still requires the balance to be settled.
- Show card information popup: opens the card details workflow when adding a card payment. It lets staff select card type and network and review the configured processing fee and final charge.
- Force employee clock-in on first login: prompts an employee who is not clocked in to clock in when signing in at the store.
Each location can also maintain Saved Invoice Notes, so staff can insert reusable wording into a job rather than typing it repeatedly.
CONFIGURE CARD PAYMENTS
Card processing fees
After saving a store, open Set Card Processing Fees to define a base amount and percentage by card type and network. You can apply the configured rates to selected other stores; doing so replaces their existing rules, and later changes remain independent.
In the desktop card information popup, CASA uses the selected type and network to calculate the fee as the configured base amount plus the percentage of the payment amount, rounded to cents. The fee and total charge are shown before the payment is added; refunds do not receive a processing fee. Configure the card information popup as well as the rates when using this workflow.
Card processing fees are separate from invoice line-item shop fees and their exemptions. Review your payment processor's rules and applicable requirements before configuring fees.
SEND FROM YOUR SHOP
Email and SMTP settings
The store's Email Settings configure how the desktop sends transaction documents. Enter the email provider's SMTP host, port, username, password, security option, and the desired From Email and From Name. Use the connection and credentials required by your provider; an app password may be needed. When SSL is not selected, the desktop uses STARTTLS.
The Invoices profile is used for invoice emails. Orders & Payments can use the same settings or a separate SMTP profile and sender for purchase orders, return orders, and payment statements. This lets a shop use one customer-facing sender and another for supplier and payment communications, subject to what its email provider permits.
Use Test Email Configuration to check the connection, and send a representative document to verify the configured sender and message. The test signs in with the SMTP username, whereas document sending currently signs in with the From Email address and password. A successful test therefore does not guarantee document delivery when those addresses differ; use a sender address your provider accepts for authentication and test an actual document. Email settings can be copied from another store.
Separately, Edit Default Email Subjects & Content lets each store maintain default messages for invoices, purchase orders, return orders, and payments; these templates can also be copied between stores.
KEEP THE TEAM IN SYNC
Scheduling and other store data
A store's time zone is required for correctly handling appointments and business times. CASA also stores messaging and appointment reminder settings for the location where messaging is available.
On desktop, open Schedule > Calendar Settings with Open Settings permission to customize the calendar for the device's default store. Set the displayed start and end times, with the start before the end. Show All Day View places all-day appointments at the top instead of filling the regular day view; Show Unassigned Events controls whether events without an assigned technician are shown.
The same screen lists the store's active technicians: double-click a calendar display name to edit it, drag rows to arrange their calendars, and save. These names and ordering are specific to that store, so a technician working at multiple locations can be arranged differently at each. See technicians and calendars for employee setup.
Taxes and fees are associated with stores through tax configuration, while inventory quantities and locations are maintained per store. The default cash drawer is a separate device setting, selected for that store. These location-specific settings help a multi-store business share a catalog without treating every shop as if it has the same stock or operating context.
EMPLOYEES
Set up your team
Employee records connect the people in your shop to their stores, permissions, sales, appointments, and time records. For first-time setup, the CASA support team will provide the administrator with a temporary employee password to sign in and perform the initial employee setup. Create individual employee records and passwords for your team rather than sharing a login.
In the desktop Employees screen, search for an employee or select Clear / New. Enter a name and a unique employee password, then select at least one store where the employee works. CASA assigns a unique ID when the record is saved. The record also holds phone numbers, email, address, hired and fired dates, and notes for your reference. The desktop describes employee passwords as unique and 4–8 characters; keep them private.
Select every applicable store in Stores. An active employee must be assigned to the device's default store to sign in or clock in there; an employee working at several locations can be assigned to each. The Clocked In indicator shows current shift status rather than setting a shift manually.
PLAN THE INSTALL BAY
Technicians and their calendars
Enable Technician on an active employee to make them available as a technician on invoices and give them a place on the schedule for their assigned stores. Salespeople and other employees do not need to be technicians just to use CASA.
In Calendar Settings for each store, customize the technician's Calendar Display Name and drag the rows into the desired display order. These settings affect how the schedule is presented, not the employee's actual name or store assignments. If the employee works at more than one store, configure each store's calendar separately.
Appointments reserve time on a technician's calendar; labor time records actual work against an invoice line. They are complementary, not the same clock.
CONTROL ACCESS
How employee permissions work
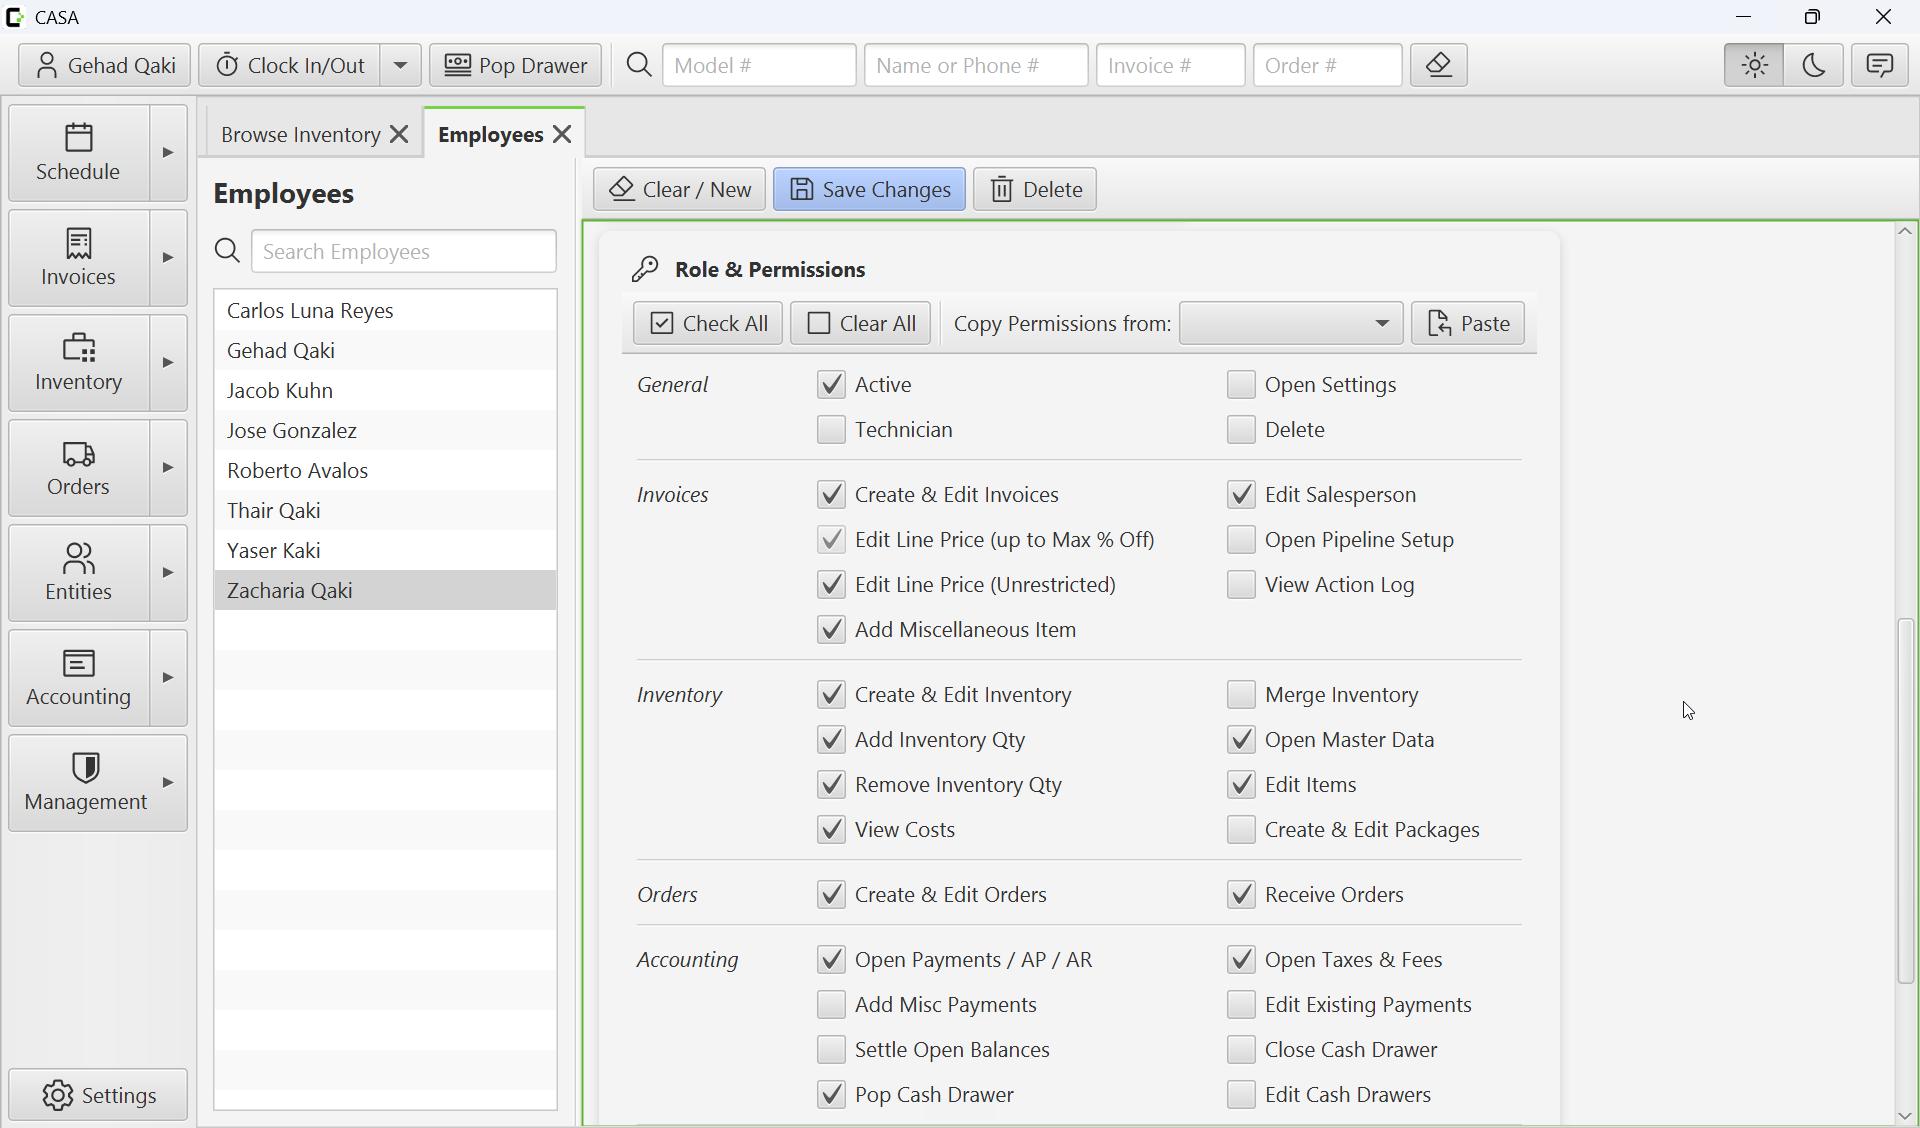
Each employee has individual permission checkboxes in the desktop Employees screen. Give people the access their jobs require, and reserve sensitive actions for trusted staff. CASA checks the signed-in employee for protected desktop actions; if nobody is signed in, it prompts for an employee password. Permissions are not a substitute for keeping passwords and device access secure.
Active allows an employee to sign in and appear in active employee choices; clear it to deactivate access. Technician identifies a person eligible for technician choices and scheduling. Open Settings permits opening workstation and calendar settings. Delete permits deletion actions across supported records; treat it as a broad, sensitive privilege.
Use Copy Permissions from and Paste to start from a similar employee, then review each checkbox; Check All and Clear All are also available. Some options depend on others: invoice pricing, salesperson editing, and miscellaneous items require Create & Edit Invoices; payment editing, miscellaneous payments, and settlement require Open Payments. Unrestricted price editing includes the ordinary price-edit permission, and payroll for all includes payroll for self.
PERMISSIONS: SALES
Invoice permissions
- Create & Edit Invoices: create and edit invoices and estimates.
- Edit Salesperson: change the salespeople on an invoice. This affects commission attribution and should be restricted to trusted employees.
- Edit Line Price (up to Max % Off): change invoice line prices or discounts within the inventory model's configured maximum discount.
- Edit Line Price (Unrestricted): edit prices or apply discounts beyond that limit.
- Add Miscellaneous Item: add a miscellaneous item to an invoice rather than only using catalog entries.
- Open Pipeline Setup: manage pipeline stages. It does not control choosing a stage on an individual invoice.
- View Action Log: view the record of actions taken on an invoice.
PERMISSIONS: PRODUCTS & PURCHASING
Inventory and order permissions
- Create & Edit Inventory: maintain inventory model information, rather than manually changing stock quantities.
- Merge Inventory: combine inventory records and their history.
- Add Inventory Qty: add anonymous stock without an order.
- Remove Inventory Qty: manually remove available stock without an invoice.
- Open Master Data: manage inventory makes, classes, and categories.
- Edit Items: edit item-level fields such as status, serial number, and store.
- View Costs: view cost information, including unit and sheet costs, in cost-controlled views.
- Create & Edit Packages: maintain packages of products and services.
- Create & Edit Orders: create or edit purchase and return orders.
- Receive Orders: receive shipments through the order workflow.
PERMISSIONS: MONEY & CONTACTS
Accounting and entity permissions
- Open Payments / AP / AR: open payment browsing, including accounts payable and receivable views.
- Add Misc Payments: create standalone income or expense payments outside invoice entry.
- Edit Existing Payments: open an existing payment and update editable details such as balance and notes.
- Settle Open Balances: apply payments to open payment balances through settlement.
- Open Taxes & Fees: open the tax and fee configuration.
- Close Cash Drawer: run the drawer-closing workflow.
- Pop Cash Drawer: open the drawer without collecting an invoice payment.
- Edit Cash Drawers: create, edit, or delete store cash drawers.
- Create Financer/Vendor: create or edit financer and vendor entities.
- Edit Credit: permission for editing entity credit.
- Merge Entities: merge entity records and their history.
PERMISSIONS: MANAGEMENT
Management and payroll permissions
- Open Employees: access employee management and maintain employee records, including permissions and compensation. Give this access special care.
- Open Stores: access store management and configuration.
- Open Dashboards: open business dashboards and reports protected by this permission.
- Open Payroll for Self: access the employee's own payroll report. In the desktop report, the employee and compensation parameters are not editable with self-only access.
- Open Payroll for All: select employees and adjust report compensation parameters for payroll review; it includes self access.
- Add / Override Time Log: add or correct shift time logs and labor logs. Limit this to people trusted to make timekeeping corrections.
Review permissions when duties change and deactivate former employees promptly. In particular, access to employee, store, payment, cost, and payroll information deserves careful review. The permission descriptions here cover the application controls; avoid assuming they provide a complete security boundary for every external integration or API client.
PAYROLL & COMMISSION
Compensation defaults and the payroll report
On each employee record, choose Hourly and an hourly rate, or Salary and an annual salary. Set the weekly overtime threshold and, for hourly employees, the overtime multiplier. The record also holds a commission basis and three rates: the general rate for a solo salesperson, plus primary and secondary rates for a split sale.
When an employee is selected in the desktop Payroll report, CASA loads these saved settings into the report. Choose the date range, optional store, inventory types, and sheet-cost source, then run it. A user with payroll-for-all access can adjust the displayed compensation parameters for the report; these adjustments do not change the employee's saved defaults. Check the parameters and filters each time, especially when pay arrangements change.
Closed clock-in/out shifts in the selected range provide adjusted hours. The report groups those hours into weeks beginning Sunday, splits weekly hours at the selected overtime threshold, and calculates hourly wages as standard hours times the rate plus overtime hours times the rate and multiplier. For salary, the desktop estimates wages from annual salary divided by 52, multiplied by the number of weeks in the inclusive date range. Open shifts have no payable hours in the report until closed. Partial weeks or a store filter can omit hours needed for a complete overtime calculation, so review the full relevant workweek and locations.
Commission uses invoice lines from completed sales in the selected range where the employee is a salesperson. Total basis uses line sale value; Profit uses sale price minus sheet cost, multiplied by quantity. Select current inventory sheet cost or the sale-time snapshot. In the desktop report, a solo primary salesperson uses the general rate; when a secondary salesperson is present, each employee's primary or secondary rate applies according to their role. Excluded lines produce no commission. Changing a line's exclusion in the report saves it on the invoice line, affecting subsequent commission reports, not just the current view. Review the selected types, exclusions, salesperson assignments, and sheet costs before using the results.
TRACK THE SHIFT
Clock in and clock out
On desktop, choose Clock In/Out or press F2, enter your employee password, and select In or Out. Optional comments can explain the entry. CASA records the shift against the default store; the employee must be active and assigned to that store. The button's menu shows who is currently clocked in and can also show active labor sessions.
A store can require an employee who is not already clocked in to clock in on first login. When clocking out with active job labor, Stop Active Labor Session is selected by default, but can be unchecked. Clocking out of a shift and stopping job labor are separate actions.
In Payroll, authorized staff can add a missing shift or override and restore a time log; original times and override information help with review. Use these corrections carefully and review adjusted hours before calculating pay.
TRACK WORK ON THE JOB
Technician labor time in and out
To record actual work, select a labor line on an invoice and choose Log Labor Time. The technician enters their own password and starts or stops the session, with optional comments. They must be active, marked as a technician, and assigned to the invoice's store. The invoice must be committed to start a session, and completed invoices cannot log more labor.
A technician can have one active labor session at a time. Starting work on another labor line automatically stops the previous session. If the technician is not clocked in for their shift, the dialog offers an optional Clock In checkbox when starting labor. Stopping labor does not itself clock the employee out of their shift.
Use the technician time report to review job labor and, with Add / Override Time Log permission, add or correct labor entries. Job labor helps explain where work time was spent; payroll shift hours come from the separate employee time log, not by adding labor sessions together.
TAXES & FEES
Set up the charges your shop applies
CASA lets you define separate taxes and line-item fees, decide which stores and products they apply to, and review the resulting breakdown on an invoice. Open Accounting > Taxes & Fees on desktop; the employee needs Open Taxes & Fees permission. Search and double-click an existing rule, or select Clear / New to create one.
Choose Tax for a tax your business needs to collect, such as a sales tax. Choose Fee for a separate line-item charge, such as a shop supplies fee. CASA tracks the two in separate invoice totals, and tax and fee exemptions are independent. A line-item fee is not the same as a card processing fee, which belongs to the payment workflow.
Give each rule a unique, descriptive name, enter a positive rate, choose its stores and defaults, and save. You can also add notes and control whether the rule is active. Configure charges and exemptions according to your shop's actual obligations; consult your tax professional or applicable local rules when needed.
CHOOSE HOW TO CHARGE
Percentage versus fixed amount
Select % to calculate a percentage of the eligible line's extended total after its line discount. For example, an 8% tax on an eligible $100 line is $8. A percentage can vary with the value of the sale.
Select $ for a fixed amount per unit of eligible quantity, not a single flat charge per invoice. For example, a $1.50 fee on a line with quantity 3 is $4.50. When the same rule applies to multiple eligible lines, CASA adds its calculated amounts together for the invoice's breakdown.
Each tax or fee is calculated separately; its invoice allocation is rounded to cents. Enable Minimum is available for percentage rules, not fixed-amount rules.
SET A FLOOR FOR A PERCENTAGE
How a minimum works
For a percentage fee, Enable Minimum sets a minimum dollar charge for that rule on the invoice. CASA first adds that rule's percentage charges across all eligible, non-exempt lines. If the combined result is positive but less than the minimum, CASA charges the minimum instead. Otherwise, it charges the calculated percentage. The minimum applies once to the rule's invoice total, not once per line.
- Without a minimum: a 2% shop fee on $100 of eligible sales is $2; on $500 it is $10.
- With a $5 minimum: the same 2% fee on $100 calculates to $2, so the fee becomes $5. On $500 it calculates to $10, so the actual $10 fee applies. At $250 the calculation equals $5, so the charge is $5.
- Multiple lines: two eligible $100 lines calculate to $4 together at 2%, so the $5 minimum applies once, not twice.
A minimum does not create a charge when there is no eligible positive calculated amount: an exempt or inapplicable fee does not become payable just because a minimum is set. Zero or negative combined amounts are not raised to the minimum. The same percentage-minimum control is also available for taxes; use it only where appropriate.
TARGET THE RIGHT SALES
Choose stores and inventory types
Under Invoices from these Stores, select each store that should use the rule. A rule can be shared by multiple stores. If no store is selected, CASA warns that the rule will not apply on invoices. A device's default store normally sets the store on a new invoice, but the invoice's own store determines its eligible rules.
Under New Inventory of the selected Types, choose any combination of Standard, Bulk, and Labor. These are defaults for assigning the rule to newly created inventory of those types, not an instruction to charge every existing item of that type. Review or change the selection on an individual inventory model's Taxes & Fees tab.
Miscellaneous Invoice Lines is a separate default for miscellaneous lines, which do not add a tax or fee association to an inventory model. It still requires the rule to be active and assigned to the invoice's store.
SAVE SETUP TIME
Apply a rule to existing inventory
When creating or editing a rule, turn on Upon saving, apply to the selected inventory types above to add this rule to existing inventory models of the checked Standard, Bulk, and Labor types. This is useful when introducing a new sales tax or shop fee to a large catalog. For example, select Labor and enable the switch to assign a shop-supplies fee to existing labor models.
The operation adds this association without removing other taxes or fees, and already-associated models are not duplicated. It applies to matching inventory models across the catalog, not just stock at the selected stores; the selected stores still determine where the rule can be charged. The Miscellaneous checkbox does not bulk-assign inventory. Changing defaults or leaving the switch off does not remove existing associations.
For exceptions or a narrower selection, edit an individual inventory model or use inventory Edit Selected > Set Taxes & Fees. Unlike the add-only switch above, Set Taxes & Fees replaces the selected models' existing tax and fee associations with your new selection. Review the affected inventory and store assignments before using a broad update.
FROM CONFIGURATION TO INVOICE
How charges and exemptions apply
For a catalog item, a rule must be active, assigned to the invoice's store, and assigned to that inventory model to apply. All three conditions matter: assigning a rule to a store alone does not make every catalog item taxable, and assigning it to an item does not make it apply at every store. Miscellaneous lines instead use the store's active miscellaneous defaults.
Invoice-level and line-level Tax Exempt and Fee Exempt settings independently exclude the corresponding charges. Customer exemption settings can populate invoice exemptions; review the actual invoice and line settings before completing a sale. Exempt lines do not contribute to the corresponding rule's minimum calculation.
Review the invoice's tax and fee breakdown, especially after changing quantities, discounts, customers, or exemptions. Taxes and line fees are separate from card processing fees; exempting a line fee does not automatically waive a card processing fee.
KEEP RULES CURRENT
Review and maintain your setup
When a rate or store association changes, review the rule and affected inventory, then test representative invoices for each store and product type. The desktop recommends restarting CASA on all workstations after saving changes so staff use current configuration.
Prefer marking an obsolete rule inactive rather than deleting it. Completed invoices retain their recorded tax and fee breakdown, and CASA prevents deletion of a rule that has been charged on invoices. An inactive rule no longer applies to new calculations, but preserves the historical record.
CASH DRAWERS
Track cash by drawer and store
A CASA cash drawer represents a cash location at a particular store. Separate drawers let your team associate cash payments and transfers with the right register and reconcile each drawer independently. The record tracks a starting amount and time, while close and transfer histories help explain how cash moved.
On desktop, open Accounting > Cash Drawers with Edit Cash Drawers permission. Select Clear / New, enter a unique name, choose the store, and set the drawer amount and its As of date and time. Set the drawer active and save. Use an accurate counted starting amount and the time it was counted; later cash activity is calculated from that baseline.
CONNECT THE RIGHT REGISTER
Device and store defaults
For each device that handles cash, select a default cash drawer in local Settings from the active drawers at that device's default store. This selection is per device and is optional, so check it on each desktop or Android device; choosing a drawer on one does not configure the others. On desktop, you can also select Use on this device when saving an active drawer belonging to the default store.
The device default supplies the drawer for applicable cash-payment workflows. Check the drawer and store on the transaction: cash assigned to a drawer must belong to an active drawer at that transaction's store. A cash payment with no drawer association is not included in any drawer's close calculation, so investigate missing associations when reconciling.
Store Default is a separate setting on the drawer record, identifying the store's main drawer; it does not automatically set every device's local default. Some workflows use the store default as a fallback, such as a cash balance settlement without an explicitly selected drawer. Only one active drawer can be the store default at a time.
CONTROL ACCESS
Drawer permissions and hardware
- Pop Cash Drawer: permits opening the physical drawer using the standalone Pop Drawer button without collecting an invoice payment. The invoice payment workflow can also trigger a hardware pop.
- Close Cash Drawer: permits the close workflow and recording a counted close. Opening drawer management itself requires Edit Cash Drawers; the Payments screen also provides a close action for users who can open Payments.
- Edit Cash Drawers: permits opening drawer management, creating and editing drawers, changing the baseline, and transferring cash between drawers. Deleting a drawer also requires Delete permission.
- Open Settings: permits changing workstation settings, including the device default and hardware configuration.
On desktop, hardware opening is configured separately from the CASA drawer record: choose a serial (COM port) connection, a supported printer connection, or None in workstation Settings. Selecting the correct drawer record alone does not configure the physical device. Keep sensitive permissions limited to trusted staff.
COUNT AND RECONCILE
Close a drawer
Choose Close Drawer from Payments, or select a drawer in Cash Drawers and choose Close Drawer. Select the correct drawer, physically count the cash, and enter Counted Cash. CASA shows the expected amount and variance after the count is entered. Add notes as needed, and record any cash added to or withdrawn from the drawer at close.
Expected cash = starting amount + recorded cash payments − cash payouts/refunds + transfers in − transfers out. More precisely, CASA sums the signed amounts of cash payments associated with that drawer and the net transfers after the baseline time through the close. Payments and transfers at or before that time are excluded; the baseline should already account for them. Card and other non-cash payments are not included.
Variance = counted cash − expected cash. A positive variance means more cash was counted than expected; a negative variance means less. CASA recalculates expected cash when the close is saved, so activity recorded after the preview can change the final variance.
Next starting cash = counted cash + amount added − amount withdrawn. For example, if the drawer started with $100, took $250 in net cash payments, received a $20 transfer, and sent $10 out, expected cash is $360. A $358 count gives a $2 shortage; withdrawing $258 and adding nothing leaves $100 as the next starting amount. Added and withdrawn amounts must be nonnegative, and the withdrawal cannot exceed the counted plus added cash.
Saving records the close, its variance and notes, and starts the next calculation period using the cash left in the drawer. Investigate discrepancies rather than assuming a close explains their cause.
MOVE CASH WITH A RECORD
Transfer between drawers
In Cash Drawers, choose Transfer Cash. Select the source and destination, enter the positive amount, and save with Edit Cash Drawers permission. Both drawers must be active, different, and belong to the same store. The amount cannot exceed the source drawer's recorded expected cash; physically move the cash as part of your shop's procedure.
CASA records the amount, time, source, destination, and employee. The transfer reduces the source's expected cash and increases the destination's expected cash in their respective open periods. It is not a sale or a payment, and it does not itself close either drawer.
RESET AN INACCURATE BASELINE
Correct the amount as of a date and time
If a drawer's baseline is wrong, an employee with Edit Cash Drawers can open the drawer record, enter the verified Drawer Amount and matching As of date and time, and save. The desktop editor saves this time to the minute in the drawer's store time zone, so take care with activity around that cutoff. This replaces the starting amount and cutoff for future close calculations; it is not an amount to add to the existing balance.
For example, after investigating a discrepancy you count $200 at 2:30 p.m. and set $200 as of that time. A later $50 cash payment assigned to the drawer produces an expected $250, before other subsequent payments or transfers. CASA includes recorded activity strictly after the selected time, so do not select an earlier time if that activity is already included in your count, or it may be counted twice. Conversely, moving the cutoff forward excludes earlier activity from the new calculation.
KEEP AN AUDIT TRAIL
Review drawer history
The desktop drawer screen includes date-filtered Close History and Transfer History, with CSV export for one drawer or all drawers. Close history records who closed it, expected and counted cash, variance, additions, withdrawals, next starting cash, and notes; payment count and transfers in and out can also be displayed. Transfer history shows the drawers, amount, time, and employee.
Use payment search to investigate cash activity for a particular drawer. Editing or deleting a cash payment from an already closed period can affect reconciliation, so review the warning and history before proceeding. Prefer deactivating an obsolete drawer over deleting it; deletion can remove close history and clear payment references, and a drawer with transfer history cannot be deleted.
ENTITIES & VEHICLES
One record, multiple business relationships
An entity is a person or business your shop deals with. Its Acts As roles determine how it appears throughout CASA. An entity must have at least one role, and the same record can have more than one:
- Client: a customer who buys from your shop, selected on invoices and associated with vehicles and sales history.
- Vendor: a supplier you buy from, selected for purchase and return orders and associated with inventory vendor models and costs.
- Financer: a financing or leasing business that pays for a customer's purchase; it can be selected as the billing entity for an open payment on an invoice.
For example, another shop may buy installations from you and also supply parts. Mark one entity as both Client and Vendor to maintain shared contact and accounting information while seeing it in the appropriate sales and purchasing workflows. Adding or saving vendor or financer roles requires Create Financer/Vendor permission.
KEEP CONTACTS ORGANIZED
Entity information
Use the desktop Entities menu to browse clients, vendors, or other entities, or create a record. Give it a name and select its roles. CASA assigns an ID and creation date. Store phone numbers, email, contact person, address, website, account number, type, and notes as needed; these fields help staff identify and communicate with the right business or customer.
Phone numbers are useful for quickly finding clients on an invoice. CASA warns about a missing phone or one already used by another entity, but a shared phone does not necessarily mean two records are duplicates. Some store settings require phone or email on invoice clients; see store invoice settings.
UNDERSTAND THE ACCOUNT
Accounting, terms, and credit
The accounting area includes a tax ID, default Tax Exempt and Fee Exempt settings, and Open Terms, the default number of days allowed to settle an open balance. Tax and fee exemptions are separate; fee exemption concerns line-item fees, not card processing fees. Review the invoice's actual settings before completing it.
Credit is a read-only net balance derived from unused account-credit memos across stores, rather than a number typed directly into the entity. Use Shortcuts > Add Credit Memo to record credit, and use the relevant invoice or settlement workflow to apply it. Creating a memo requires the appropriate payment permission. Review the individual memos and open balances, especially when an entity is both a customer and supplier.
In the current API calculation, a positive entity credit represents net customer credit available to spend on an invoice, while negative entity credit can represent credit owed to your shop by a vendor. For example, $100 of customer credit and $25 of vendor credit for the same entity produce a net $75. Individual payment balances use the opposite sign convention, so inspect the underlying memos rather than relying on a sign alone.
KNOW THE CUSTOMER'S VEHICLE
Client vehicles and vehicle details
A client can have multiple saved vehicles. In the entity's Vehicles section, add or edit a vehicle and save the entity. Later, select an existing vehicle when creating an invoice instead of entering it again. A vehicle record can include year, make, model, trim, description, VIN, license plate and state, odometer, color, and vehicle notes.
A catalog vehicle is selected through CASA's year, make, model, trim, and description choices. Use Custom Vehicle to type those identification fields when a suitable catalog entry is unavailable, such as a less common vehicle or a different kind of vehicle. Both represent a specific vehicle on the customer's record; choosing a catalog entry does not replace the vehicle-specific VIN, plate, color, or notes.
Check details with the customer and update them when needed. For the invoice workflow, see customers and vehicles.
REDUCE MANUAL ENTRY
Decode a VIN or license plate
In the vehicle editor, enter a VIN and choose Decode VIN; the desktop can match the decoded vehicle to its catalog and may ask you to select the remaining trim or description. If no catalog match is available, decoded details may be offered as a custom vehicle. VIN details can also show additional returned information. Review the result before saving: decoding may be incomplete or require a choice.
With the optional license plate decoding add-on enabled, enter the plate and state and choose Decode Plate. CASA looks up the VIN and then decodes it; a returned color may also be populated. VIN scanning is also available in the Android invoice workflow. Availability and returned details depend on the lookup and subscription.
START FROM THE RELATIONSHIP
Useful entity shortcuts
On a saved entity's desktop page, Shortcuts gives quick access to related work:
- New Invoice: start an invoice for the selected client.
- Invoice History: open invoice search using the client's name, across stores. Since this is a name filter, review results when different clients share a name.
- Order History: open orders filtered for a vendor, initially covering the last 365 days. Change the date filter to find older orders.
- Payment History: browse payments associated with the entity, whether client, vendor, or financer.
- Add Credit Memo: record account credit for the entity through the payment workflow.
Client and vendor shortcuts are enabled for their respective roles; payment history and credit memos can be useful for any role. The corresponding action and report permissions still apply.
CLEAN UP DUPLICATES
Merge entity records
If two records represent the same person or business, open the record you want to keep, choose Merge, and search for the duplicate to merge into it. This requires Merge Entities permission. Verify names, IDs, roles, and transaction history carefully before proceeding: the duplicate source record is deleted.
CASA moves the source's vehicles, invoice client links, payments, order vendor links, and nonconflicting inventory vendor models to the retained entity, then recalculates its credit. For conflicting vendor models or custom email settings of the same transaction type, the retained record's settings win. The retained entity's own contact information and roles remain; review and update them afterward rather than assuming every field or role is combined automatically.
SEND THE RIGHT MESSAGE
Custom recipients and email content
When editing a client or vendor, choose Set Custom Emails or Edit Custom Emails to maintain recipient lists and message content by transaction type. Clients have an Invoices tab; vendors have Purchase Order and Return Order tabs; the editor also provides a Payment tab. An entity with both roles can configure the relevant messages for each.
For example, save a dealership's invoice recipients and preferred wording, or a supplier's order desk and representative for purchase orders. When sending a document, CASA can prefill the applicable recipients and custom message. If no custom recipients are set, the entity's regular email can be used; store defaults provide message content when no custom body is available. Review recipients and content in the email dialog before sending.
Invoice emails may also include recipients from billing entities on open payments. For a payment statement covering multiple entities, CASA gathers recipients but uses an entity-specific body only when there is a single addressed entity. Sender accounts and store-level default subjects are configured separately in store email settings.
BRING YOUR RELATIONSHIPS TOGETHER
Import entities from a CSV
Use Import Entities from the desktop Entities page to bring in clients, vendors, or financers, or to update records from a CASA export. Prepare a CSV with a Name column and the identifiers needed for the chosen match method; check duplicate rows and keep a copy of the original file.
- Select the file, set the delimiter, encoding, skipped rows, and header option, and check the preview.
- Map columns to fields such as name, phones, contact information, address, notes, and account details. Auto Map provides suggestions; review them. Choose the roles, uniqueness basis, and import behavior.
- Validate the rows and review their proposed create, update, skip, or error decisions. Correct problems in the file or settings and revalidate before starting the import. Review and export failures after the import.
Choose one fixed role for the file, or map an Acts As column containing comma-separated Client, Vendor, and/or Financer tokens for each row. This is useful for CASA exports and records with multiple roles.
CHOOSE THE RIGHT IDENTITY
Entity uniqueness methods
The uniqueness basis determines which existing entity a row may update or skip. It does not merge duplicates, and matching the wrong record can overwrite its mapped information.
- Entity Id: match an existing CASA ID. Recommended for reimporting a CASA export from the same account. Do not treat IDs from another system or CASA account as equivalent: an ID that happens to exist can target the wrong entity. New entities receive CASA-assigned IDs.
- Name + Phone: require both a matching name and phone; a useful choice for data from another system. Names are compared without case differences and phone formatting is reduced to digits. The imported Phone can match either stored phone number. Both values are required, so a changed name or phone may prevent a match and lead to a duplicate if creation is enabled.
- Just Name: match by name alone. Not recommended when different people or businesses can share a name; a unique but wrong match could update the wrong entity, while multiple existing matches produce an error.
- Just Phone: match by phone alone against either stored phone. Not recommended when family members, businesses, or contacts share a number. Missing or changed numbers can prevent a match; a shared number can lead to a wrong match or an ambiguity error.
All methods require a mapped Name column. ID matching also requires a mapped Entity Id; phone-based matching requires a mapped Phone. Multiple existing candidates are reported as an error rather than chosen automatically. Review the proposed decisions carefully, including rows with missing identifiers.
CONTROL THE RESULT
Choose behavior and review results
- Update Matching Records only: update matches and skip unmatched rows.
- Update Matching Records and Create New: update matches and create entities for eligible unmatched rows.
- Create New only: create eligible unmatched entities and skip matches.
On updates, populated mapped fields can replace existing values; blank cells generally leave existing values unchanged, except that roles are set by the selected role option. Review sensitive fields such as tax exemptions, terms, and credit before mapping them. Validation cannot tell whether an otherwise valid match is the person you intended.
Inspect the validation decisions and resolve duplicates before starting. Matching checks existing records, so two rows for the same new entity in one file can both be marked Create; deduplicate the file rather than relying on the preview to catch them. Imports are processed row by row: successful changes remain even if other rows fail. Review the created, updated, skipped, and failed counts, export failures, and verify a sample of the resulting entities and roles before importing the rest.
INVENTORY
Start with master data
Good inventory starts with a shared vocabulary. The Master Data page is where your shop manages the makes, classes, and category tree used throughout its inventory. Plan these before building your catalog: consistent choices make items easier to find, maintain, and analyze as your shop grows.
- Makes identify the brand or manufacturer you want associated with an item.
- Classes are flexible labels for grouping items across categories, such as Auto, Marine, or Website.
- Categories organize what an item is in a hierarchy, from a broad product family down to a specific kind of product.
In Master Data, select Edit to add, rename, or remove makes and classes. Build categories beneath a selected parent; rename them or use cut, copy, and paste to reorganize a branch and its children. Each area has a search field. Changes are staged until you select Save; use Cancel to discard them.
CHOOSE HOW IT BEHAVES
Standard, bulk, and labor
Choose the type that reflects how your shop sells and manages the product or service:
- Standard is for discrete products sold in whole quantities, such as a receiver or amplifier. Individual physical items can be tracked, with serial numbers required when configured.
- Bulk is for material sold in measured quantities, such as wire from a spool. You can sell part of the material rather than only whole products, using a unit such as feet.
- Labor represents work, such as an installation, rather than a stocked product. It has labor-specific settings and no stock or vendor section.
The inventory model describes what you sell; stock and physical items represent the quantities and units behind that model. Choosing the right type sets up the rest of the workflow.
NAME IT FOR YOUR SHOP
Make, model, and sold-by unit
Make identifies the brand, while model is your shop's inventory code. These help identify products on invoices and can be used to find and filter inventory. The model does not have to match the manufacturer's exact spelling: choose a consistent code your team recognizes, whether that means leaving out special characters or adding a useful suffix.
For example, your shop might use 4GW for 4-gauge wire while recording SSVLP4R as a vendor model. Staff can work with the simple shop code without losing the supplier's identifier.
The sold-by unit makes quantities clear on invoices and orders: for example, each, pair, or set for standard products; feet or another supported measurement for bulk; and job or hour for labor. Choose a unit that reflects how the line is sold.
ORGANIZE AND FIND
Classes, categories, and powerful search
Classes and categories answer different questions. A car audio shop might use classes such as Auto, Marine, Motorcycle, and ATV. Another business might use Wheels, Tires, and Mechanic. An item can have multiple classes, so the same product can be tagged for more than one market or purpose.
Classes can also act as flags. For example, assign a Website class to products intended for an e-commerce site. A third-party integration can use that classification when deciding which products to include; assigning the class alone does not publish an item or configure the integration.
Categories form the product hierarchy. For example: Speakers → Coaxial → 6.5-inch. We recommend assigning an item one most-specific leaf category rather than multiple categories or a parent. This gives analytics a consistent level of detail and helps avoid ambiguous classification. In the desktop editor, category selections are saved as leaf categories.
Use the category tree to browse broad groups as well as specific products. The leaf-category recommendation is about consistent reporting and analytics, not a requirement to search only at the leaf level.
ONE MODEL, MULTIPLE SOURCES
Vendors and vendor models
The Vendors tab is available for standard and bulk inventory, not labor. Add the vendors that supply a model and record each vendor model, UPC, cost, unit quantity, and case quantity as applicable. A primary vendor model can be designated. These records connect your shop's inventory model to the identifiers and pricing used for purchasing.
The same automotive part may be available from several distributors, each using a different part number or UPC. Instead of creating a separate shop model for every supplier, record those vendor models under the same inventory item and keep each vendor's cost with its own entry.
Vendor models also let a shop group similar products it intentionally sells under one model. For example, different wire spools may have different vendor models, barcodes, costs, and lengths, yet all be sold under 4GW. For each bulk vendor model, enter the number of sold-by units in the purchased item. CASA displays unit cost = vendor cost ÷ unit quantity, making different spool sizes easier to compare. For example, a $100 spool containing 200 feet has a $0.50 per-foot unit cost.
Choose the grouping carefully: combine products only when your shop is comfortable selling them under the same model and description.
KNOW WHAT IS AVAILABLE
Stock and physical item tracking
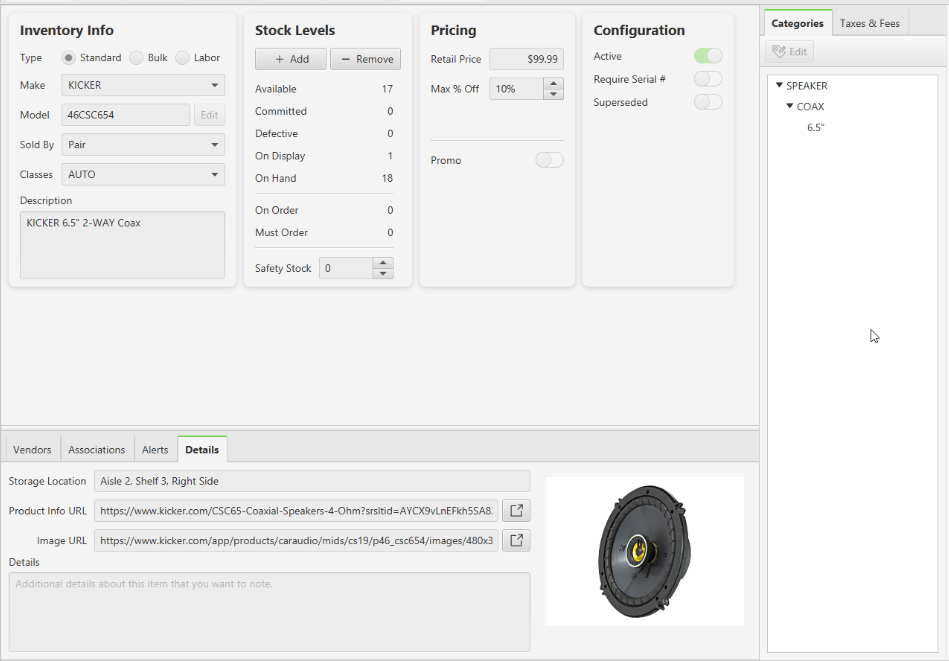
Stock is shown for the selected store. Standard products are tracked as discrete physical items; a serialized standard model requires staff to identify specific items and serial numbers when selling. Bulk stock is tracked in sold-by units: a spool can be partially consumed, leaving the remaining quantity available. Labor represents work and has no physical stock.
- Available: quantity available to sell.
- Committed: quantity reserved for invoices or committed manually.
- Defective: quantity marked or returned as defective.
- On Display: quantity used on display; CASA can ask for approval to use it when committing a sale.
- On Hand: physically present quantity: Available + Committed + Defective + On Display.
- On Order: quantity on committed, incomplete purchase orders.
- Must Order: quantity needed for committed invoices that still needs to be ordered.
On Order and Must Order are not physical on-hand stock. Together with safety stock, these figures help the team distinguish what is here from what is coming and what still needs purchasing. See must-order items in the invoicing guide for the job workflow.
COMPARE STOCK ACROSS LOCATIONS
Multi-store inventory
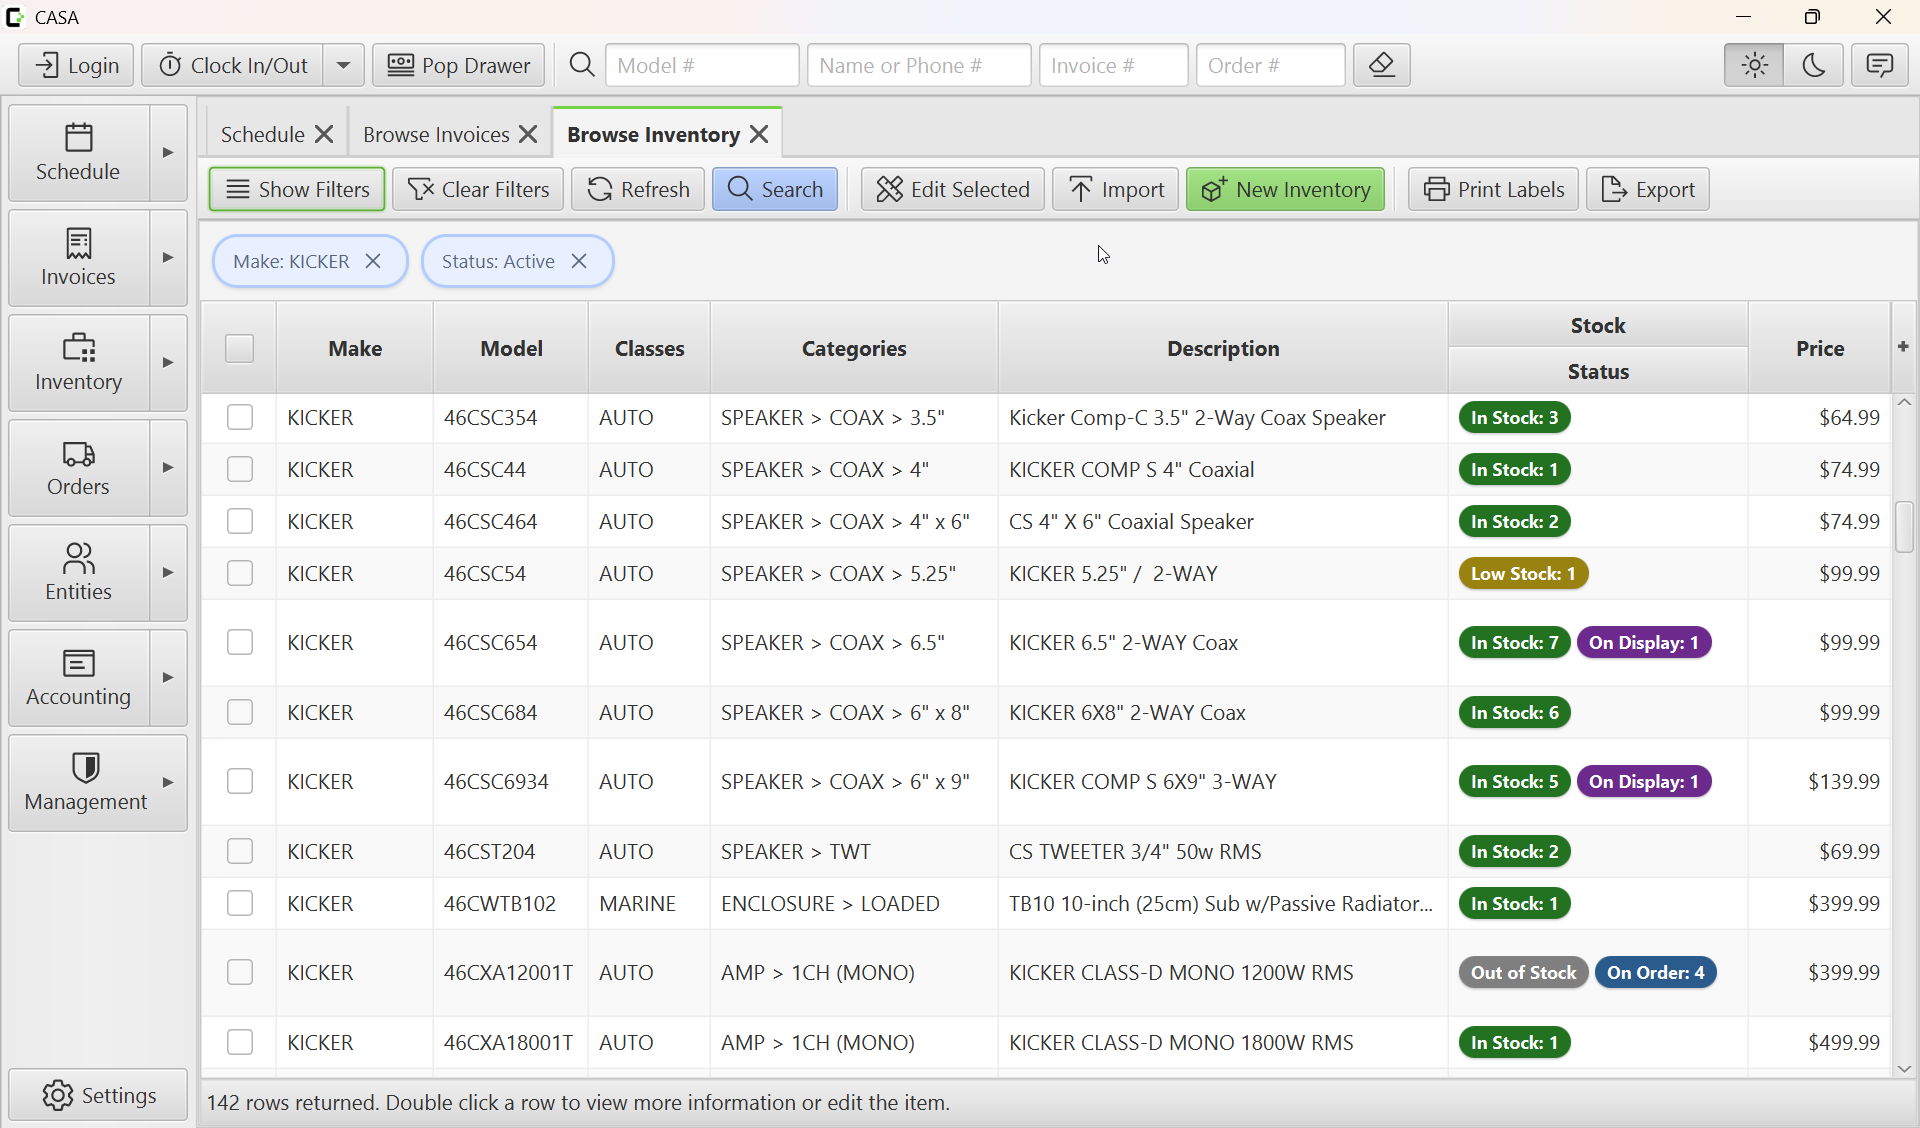
Use Multi-Store Inventory to search inventory across stores in one view. Open it from the Inventory menu, from the inventory search row menu, or from an inventory record's Shortcuts menu. When opened from a specific model, the search is prefilled with that model; otherwise, set filters and search. Filters include store, make, model, type, class, category, description, vendor and vendor model, active status, price, and stock quantities such as available, committed, defective, on display, on hand, on order, and must order.
Results are grouped by inventory model. Expand a model to see its store-specific rows; the parent row summarizes the quantities and safety stock across the stores included in the results. This makes it easier to compare availability, upcoming orders, and must-order needs between locations, while the child rows identify the store behind each count. Expand All and Collapse All help navigate a large result set.
With Edit Inventory permission, you can edit Safety Stock directly on a store's child row; the model's total row is not the per-store setting. Right-click a result for model-based Invoice History, Order History, or Itemized Inventory. Export downloads the current results to CSV using the visible columns. The table menu can show or hide columns and save its supported viewing defaults for this device.
JUMP TO RELATED INVENTORY ACTIVITY
Useful inventory shortcuts
On a saved inventory record's desktop page, open Shortcuts to jump straight to activity and related views for that model:
- Invoice History: find invoices containing the model.
- Order History: review purchase, return, and transfer activity for the model.
- Itemized Inventory: inspect the physical stock items behind the model.
- Multi-Store Inventory: compare its stock and settings across locations.
- Itemized Sales: review detailed sales records for the model.
These shortcuts are also available from the inventory search table's right-click menu where applicable, so staff can move from a search result to its history or stock details without reopening the record. The inventory model's menu opens Multi-Store Inventory already filtered to that model.
PRICE WITH PURPOSE
Pricing, promotions, and commission
- Price is the regular selling price used for a standard invoice.
- Sheet cost is the model's cost basis, distinct from the actual vendor-specific purchase cost. It is important for profit-based employee sales commission: the commission calculation can use sale price minus sheet cost as profit, with a choice of current sheet cost or the cost at the time of sale.
- Max percent off sets the model's discount limit for price editing; employee permissions determine whether someone can go beyond it. Zero means no discount and 100% allows discounting to free.
- Promo price and its start and end dates define a temporary selling price. An active promotion is applied on standard invoice lines as a discount from regular price; see adding invoice items for the invoice behavior.
Keep sheet cost and vendor costs current for their different purposes: one supports your chosen pricing and commission basis, while the other records what a specific supplier charges.
CONFIGURE THE WORKFLOW
Active, superseded, and labor settings
Use Active to distinguish current models from inactive ones when searching. If a product has been replaced, mark it Superseded, choose the replacement model, and record a reason. When adding the original through the desktop's regular model-entry dialog, CASA warns the salesperson and offers the original or replacement. Barcode and package additions can bypass that dialog.
For standard models, Require Serial # enables serial-specific tracking. For labor, configure whether the job requires a vehicle or appointment. At commitment, a required appointment must be present; a missing required vehicle prompts for confirmation. Set Job Hours to the expected time for the work so it can be compared with technician labor time logs.
BUILD A COMPLETE JOB
Inventory associations
Associate related inventory or labor with a model to remind your team about items needed or useful for the job. For each association, set a quantity, a reason, and whether it is required or optional. A receiver might have a required installation accessory and an optional upgrade, for example.
When the model is added to an invoice, the association popup shows the related choices. Required items are included when the user adds the associated items; optional items are selected individually. See the invoice association walkthrough for details.
SHARE THE CONTEXT
Alerts and details
Use the Alerts tab to write an invoice alert or, for stocked products, an order alert. The message appears when the model is added to the relevant transaction, helping staff notice important product or purchasing instructions at the right moment.
The Details tab provides space for additional notes. For standard and bulk items, it also includes the current store's storage location, a product information URL, and an image URL with a preview. Use these to help staff locate an item and research its specifications without crowding the invoice description.
MAINTAIN THE CATALOG
Edit selected inventory in bulk
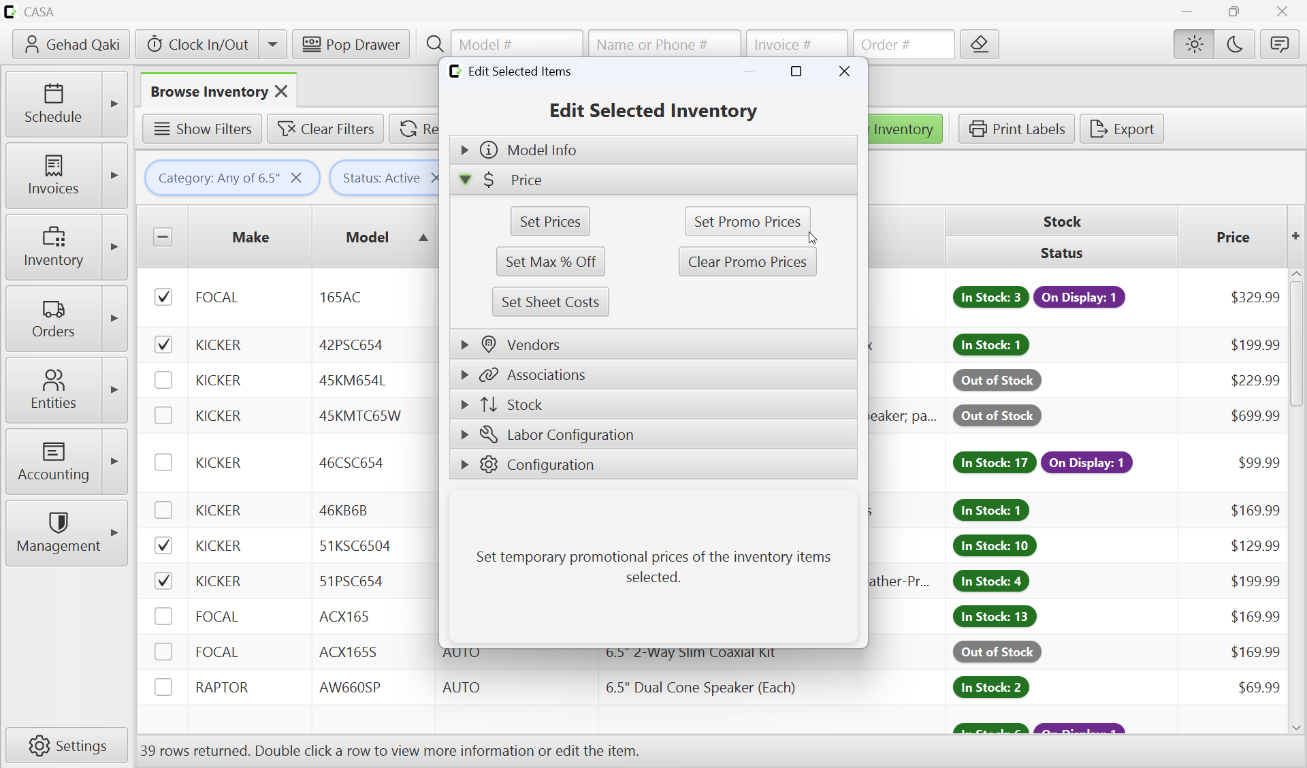
Search and select the models you want to update, then use the inventory bulk-edit tools to make a consistent change across the selection. Options include make, classes, categories, active status, taxes and fees, prices, promotional prices, sheet cost, vendor information, safety stock, associations, and applicable labor or serial-number settings.
Review the selection and the operation before saving: some actions replace existing assignments, such as taxes and fees, and type-specific operations filter out ineligible models. Bulk available-quantity changes are not recommended for serialized inventory; use itemized inventory or the appropriate receiving and stock tools to preserve individual tracking.
BRING YOUR CATALOG INTO CASA
Import inventory from a CSV
The desktop inventory import wizard can update a price list, establish catalog records, or bring in a vendor's models and costs without entering each product individually. Open Import Inventory from Inventory; editing inventory requires the appropriate employee permission.
- Select the CSV and configure its delimiter, encoding, header row, and any rows to skip. Refresh the preview to confirm that columns and values are being read correctly.
- Choose a vendor-specific or generic source and an import method, then map file columns to CASA fields. Auto Map can suggest mappings; check every suggestion, especially model, vendor model, cost, and UPC.
- Validate the data, review errors and corrections, and check the import summary before starting. Review and export the created, updated, skipped, and failed results afterward.
Keep a copy of the original file and try a small, representative import first. Preserve leading zeros in UPCs when preparing the CSV; CASA validates them as 12 or 13 digits. Imports change real records, not just a preview.
CHOOSE THE SOURCE
Vendor-specific or generic data?
For a vendor-specific file, select the vendor. In addition to general inventory fields, you can map vendor model, UPC, vendor cost, unit quantity, and case quantity. CASA looks for the selected vendor's matching vendor model first, then UPC; if neither finds a match, a mapped CASA model can identify an existing inventory record to which the vendor model may be added. If a vendor identifier matches multiple inventory records, the row is ambiguous and requires review. If the vendor model and UPC disagree, the vendor-model match takes priority.
To create new vendor-specific inventory, map a Vendor Model column; a UPC alone is not enough. When creating a new model, CASA uses the mapped Model if provided, otherwise the vendor model. A vendor line cannot be added without a vendor model, even if a UPC identifies an existing record.
Choose generic data for a shop-wide catalog or price list not tied to one supplier. Map the CASA Model to match records; generic imports support inventory fields but not vendor-specific models, UPCs, or vendor costs. Use vendor-specific imports to establish the supplier relationships needed for purchase orders.
CONTROL WHAT IS CREATED
Choose an inventory import method
- Matches Only: update matched inventory and skip unmatched rows; no new inventory models are created. A vendor-specific row matched to an existing CASA model can still add a vendor relationship.
- All rows, Active: update matches and create eligible unmatched models as active.
- All rows, Inactive: update matches and create eligible unmatched models as inactive, so your team can review them before activation.
Active or inactive is the default for new models; these choices do not change the active status of existing matched models. Invalid or ambiguous rows are not guaranteed to import just because an all-rows option is selected.
New imported models are standard unless the mapped vendor Unit Qty is greater than one, in which case CASA creates a bulk model. Check package sizes and review the resulting types; the import is not a substitute for configuring labor models and their requirements.
VALIDATE BEFORE WRITING
Review mappings, prices, and stock
Map only fields you intend to change. On updates, blank values generally leave existing values in place; a populated mapped value can replace the existing one. Promo Price requires a start and end date. Review any suggested automatic corrections instead of assuming they are appropriate for your catalog.
Review skipped rows, failures, and warnings, then inspect representative models, vendor links, costs, and stock. Rows are processed individually, so a failed row does not undo successful rows. Continue to the Items guide to learn how physical stock is tracked.
PACKAGES
Sell repeatable bundles in one step
A package is a saved bundle of inventory lines, such as a speaker, wire kit, and installation labor for a common job. Instead of searching for each model, quantity, and price on every estimate, add the package once and CASA expands it into normal invoice lines. Your counter staff sell the same job consistently, and customers can see a clear, ready-to-approve estimate.
Because the package becomes ordinary lines, each component keeps its own stock check, taxes and fees, serial-number selection, alerts, and sales reporting. The invoice remembers which package each line came from, so related lines are easy to recognize. Editing a package later does not rewrite invoices that already contain it.
CREATE THE BUNDLE
Building a package
Creating or changing packages requires the Create & Edit Packages employee permission. A package needs a unique name (up to 50 characters, entered in uppercase) and at least one line. The optional fields are the type for grouping, a description, an expiration date, an active switch, a package UPC, and the print-as-package switch.
Add lines by typing a model or scanning an inventory UPC in the package editor, then confirm the line's quantity, price, discount, and description. Standard items must be whole quantities; bulk and labor lines can use fractional quantities. Use the table to adjust line order, quantities, and discounts before saving. The type list suggests existing types, which keeps package searches tidy.
Use the expiration date for seasonal or promotional bundles and the active switch to retire a package without deleting it.
FUTURE-PROOF THE PRICE
Inherit price and line discounts
Each package line has an Inherit Price option, which is on by default. When it is on, the line uses the inventory model's current retail price every time the package is read or added to an invoice. If you change a model's price, packages using it stay current without being rebuilt.
If you turn inheritance off, or edit the line price directly, the package stores a fixed price instead. CASA turns inheritance off when you edit a line price, because the price is no longer following inventory. To keep a deal future-proof, leave inheritance on and give the line a discount, either a percentage or a dollar amount. The discounted price then tracks the current inventory price. For example, a package line with a 10% discount remains 10% below the model's price after the price changes.
The package editor shows each line's final price and subtotal, and the total. Set Package Discount applies one percentage discount to every line, replacing any existing line discounts. You can choose whether labor lines are included, which is useful when you want to discount parts but keep labor at full price.
ADD TO ESTIMATES AND SALES
Selling a package and scanning a package UPC
On desktop, choose the package button on the invoice to search and double-click an active package, or type the exact package name into the model field. Packages can also have their own 12- or 13-digit UPC. When a scanned UPC does not match inventory, CASA looks for a package with that UPC and adds all of its lines, making an entire bundle a single scan. Each package UPC should be unique; a UPC that matches more than one package cannot be used reliably to add a package.
As each component is added, CASA applies its normal checks: inventory alerts, insufficient-stock warnings, and picking physical items for serial-number-required models. Desktop also shows an optional-association prompt for a component that has associations. When you choose a package from the search window, CASA asks for confirmation if its expiration date has passed. Packages entered by name or scanned UPC do not show that expiration prompt, so keep expired packages inactive as well as dated. Desktop only adds active packages; an inactive package adds nothing.
The Android app can add a package by searching for its name and selecting it from the suggestions. It does not scan package UPCs, and it does not create or edit packages. On Android, package components skip the optional-association prompt, so check the invoice before presenting it to the customer.
CONTROL THE PRINTOUT
Print as package
By default, the invoice prints every component line. This is useful when the customer needs to see each part, quantity, and serial number. Turn on Print As Package when you want a simpler bundle presentation. CASA combines that package's lines into one printed line named for the package, with its UPC and description. It shows a quantity of one, the combined price and any discount, the total, and the serial numbers of the included items.
This changes the printed or PDF invoice only. The invoice you edit in CASA, stock, taxes, fees, and reports still use the individual lines. If the same package appears more than once on an invoice, the printout combines those lines into one package line with a quantity of one and a combined total, so confirm that this presentation suits the customer.
MANAGE MANY PACKAGES
Search and bulk editing
The Packages screen searches by name, UPC, type, active status, included model, included make, and total price. Name, UPC, and model filters offer text-matching options such as equals, contains, starts with, and ends with. The total price is calculated from the current line prices, including inherited prices and discounts. The results show the package's models, total, active status, expiration, print setting, and who created or updated it.
Select packages with the checkbox column, then use Edit Selected to change several at once. Bulk edits can set the packages active or inactive, set or clear an expiration date, set the package type, and choose Print As Package or Print As Lines. These changes also require the Create & Edit Packages permission. Bulk edit does not change a package's lines, prices, or discounts; open the package to edit those.
ITEMS
Items: the physical stock behind a model
An inventory model describes what your shop sells. An item is a record of a particular unit or quantity associated with that model. CASA uses these records to track stock by store and status, along with details such as vendor model, UPC, cost, and serial number when available.
For a standard product, an item normally represents one physical unit, such as a particular amplifier. For bulk inventory, one item can represent a quantity, such as a spool or batch of wire, with a starting quantity and a remaining sellable quantity. Labor is not physical stock, although CASA can create item records for labor and miscellaneous transaction history. Some item records represent future demand or incoming stock rather than something already on the shelf.
FOLLOW THE LIFECYCLE
What each item status means
- Available: stock available to sell.
- Committed: stock reserved for a job or committed manually rather than available for another sale.
- Defective: stock marked defective, including items returned as defective.
- On Display: stock being used on display; it may be used for a job with approval.
- On Order: incoming stock, including a committed purchase order or an item in transit on a transfer. An invoice may reserve it for commitment when received.
- Must Order: demand for a committed invoice that still needs to be ordered; it is not yet physical stock.
- Sold: an item or quantity transacted on a completed sale.
- Returned: a record of returned merchandise or a return transaction, such as stock returned to a vendor; it is not available stock.
- Removed: stock taken out of inventory or an item no longer available through that workflow.
Available, Committed, Defective, and On Display make up on-hand stock; On Order and Must Order are not on hand. Sold, Returned, and Removed are terminal statuses for the recorded quantity. A customer return can instead put stock back into Available or Defective status. Use transaction workflows rather than manually changing statuses to represent an actual sale, return, or order.
WHERE STOCK COMES FROM
Anonymous stock and order-created items
Use Add Stock on an inventory model to record stock without a purchase order. CASA records a stock-added history entry and store; you enter quantity and unit cost. The desktop can default the cost from the primary vendor's unit cost, then sheet cost, or zero. The primary vendor model and UPC may be carried onto the item, but this does not establish a purchase-order or shipment history.
For standard models requiring serial numbers, enter a serial number for each unit when adding stock. For non-serialized standard models, CASA first uses added quantity to satisfy older must-order records at that store, then creates available item records for the remainder. For bulk, each Add Stock operation creates a separate quantity-bearing item, preserving that batch's cost.
By contrast, committing a purchase order creates or assigns item records as On Order; receiving records the shipment and moves them into the appropriate stock status. These records can carry purchasing details such as vendor, order, shipment, vendor model, UPC, and cost. Returns and transfers also update or create records through their respective workflows. The exact lineage depends on how the item entered the system.
FIND THE RIGHT UNIT
Search itemized inventory
On desktop, open the items search and combine filters such as store, status, model, vendor model, UPC, serial number, vendor, order number, invoice number, and creation or update dates. Clear or change filters and search again to narrow down a particular unit or follow stock across stores. Double-click a result to open Item Info; the results can also be exported to CSV.
When filtering by vendor, Include Anonymously Added Items also includes items whose inventory model is associated with that vendor; it does not prove that the selected vendor supplied that specific unit.
MAKE A PRECISE CORRECTION
Edit a single item
Open an item from the search results and select Edit. With the Edit Item permission, you can change its status, store, vendor model, serial number, UPC, and unit cost. Cost visibility requires permission to view costs. Save to apply the changes; a changed status or store is recorded in its history.
Other information is shown for context rather than edited here, including the inventory model, inventory type, original and remaining quantities, and order or shipment lineage. Edit the inventory model for model-level settings and use the relevant order or stock workflow for actual transactions. A required serial number cannot be left blank; a UPC may be blank or must contain 12 or 13 digits.
UPDATE MULTIPLE UNITS
Edit selected items
In the desktop items table, check the selection boxes for the desired items, then choose Edit Selected. If the selection column is hidden, use the table's column menu to show it. With Edit Item permission, you can set the current status, store, vendor model, UPC, or unit cost across the selection, or assign serial numbers to the selected items.
Review the selected items and the requested change before saving. Changing a status or store in bulk affects the records and their history; setting a store directly is a manual correction, not a transfer order. For serialized stock, assign the appropriate serial number to each physical unit rather than treating them as interchangeable.
TRACE THE JOURNEY
Status history and store history
Item Info includes a Status History showing each recorded status, quantity, start and end times and users, plus the transaction description, type, and number when available. It helps explain how an item moved through purchasing, commitment, sale, return, or a manual change. For bulk, the quantity helps interpret partial use; the current history entry reflects remaining quantity.
Store History shows the stores associated with the item and when and by whom each period started and ended. A store change can also result from a manual correction or a return at another store, so use the status history and transaction information together to understand why it moved.
For a standard transfer, CASA moves the same item to the destination store when the transfer is committed and records the transfer in status history. While in transit, an ordinary item is On Order; receiving it makes it Available, or Committed if reserved for an invoice. Defective transfers retain their defective handling on receipt. For bulk transfers, CASA removes the quantity from source stock and creates destination-side item records, so the destination record is not simply the original source item moving between stores.
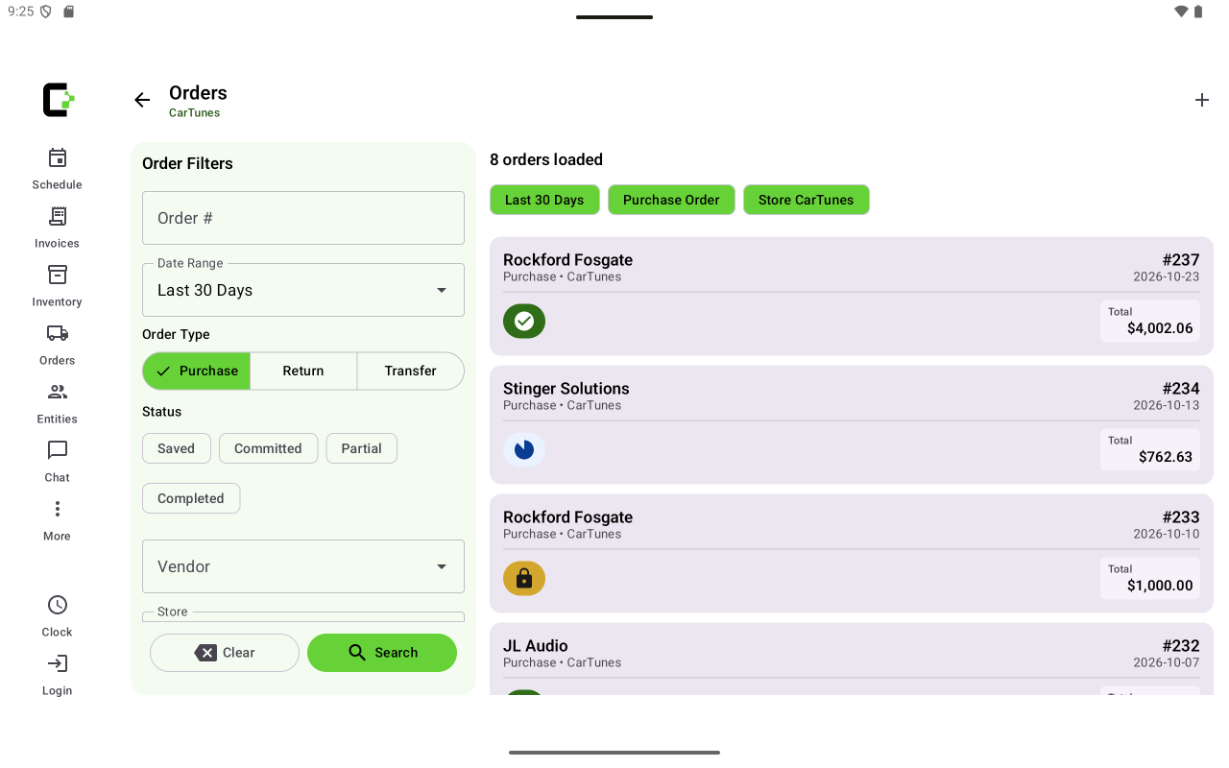
PURCHASE ORDERS
From vendor order to stock on the shelf
A purchase order records what a store intends to buy from a vendor, tracks incoming items and shipments, and helps the team distinguish stock that is on order from stock that has arrived. Start with a well-maintained inventory catalog and vendor models, then build and commit the order before receiving its shipments.
BUILD THE FOUNDATION
Set up the vendor and inventory
- Create or edit an entity with the Vendor role. The same entity can also be a client if your shop buys from and sells to the same business.
- Establish the standard or bulk inventory models you purchase. On each model's Vendors tab, add a record for the supplier with its vendor model, UPC, cost, and, for bulk products, the number of sellable units supplied per package. A model can have multiple vendors or vendor models.
- Create the purchase order, select that vendor and the store receiving the products, and add the vendor's models. The store determines where the incoming and received stock belongs.
For a larger catalog, the inventory import wizard can map columns from a vendor-specific CSV to CASA fields and match or import records according to the selected import mode. Select the vendor and review the mappings and results. Inventory bulk edit can also add a vendor to selected models and update applicable vendor information; verify the resulting models, UPCs, quantities, and costs before ordering.
BUILD THE ORDER
Add products by model or UPC
With the vendor and destination store selected, type a CASA model or vendor model in the order's product search and choose an autocomplete result. The results are associated with the selected vendor. You can also scan a UPC registered to that vendor's inventory model. If a product cannot be found, check its vendor model and UPC setup first.
The Add Order Line window shows the product, vendor model, stock and purchasing information. Enter the order quantity, cost, and description, review the details, and add the line. Order alerts can bring purchasing instructions to the team's attention. Review the order before saving or committing it.
On desktop, drag and drop lines to arrange a draft, or click a sortable column header to sort them—for example, by Vendor Model or Make. Saving the editable order saves the current row order, including a column sort. See desktop table controls for more.
ORDER IN THE RIGHT UNITS
Standard items versus bulk products
For a standard item, the order line quantity counts individual products: ordering three amplifiers creates three incoming item records when the order is committed. Stock reflects the individual units.
For bulk, the order line quantity counts vendor packages, while each package contains the vendor model's unit quantity. For example, two spools of 100 feet are two ordered items but represent 200 feet of incoming stock. Once received, the bulk item records track their remaining sellable units. The line window shows total units and the cost per sellable unit, so check the vendor's package size and price carefully.
Committing the order creates On Order items for the destination store and can match existing Must Order items for the same model and store. On Order is incoming stock, not physical on-hand stock; receipt moves ordinary items to Available and items reserved for an invoice to Committed.
REPLENISH WITH CONTEXT
Generate an order
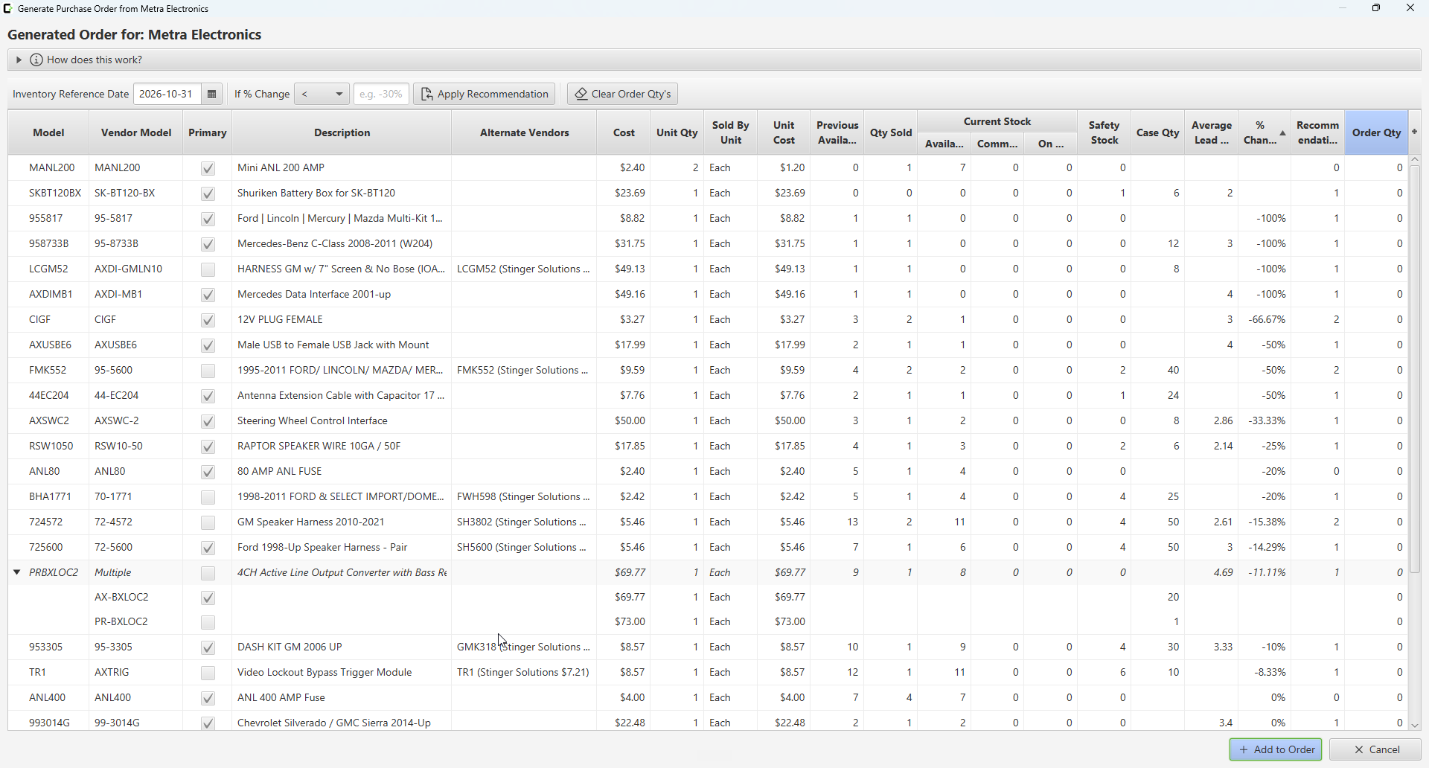
Use Generate Order after choosing a vendor and store to review purchasing suggestions rather than starting every line from scratch. CASA shows vendor models alongside information such as available stock, On Order, Must Order, safety stock, sales, case quantity, and alternate vendors. The reference date can be changed; it normally starts from the most recent purchase order for that vendor and store, or approximately one month ago if there is none.
For standard items, the recommendation considers the decrease in available stock, Must Order demand, safety-stock shortage, and sales, then accounts for stock already on order and applicable case quantities. For bulk, it uses the safety-stock shortage and the selected vendor package size, accounting for On Order. Recommendations are a starting point, not an automatic purchase: review vendor choices and quantities before adding the lines and committing.
KNOW WHERE IT STANDS
Order statuses and commitment
- Saved: an editable draft. Saving alone does not create On Order stock.
- Committed: the order has been committed and its items are tracked as On Order; no shipment has yet been recorded.
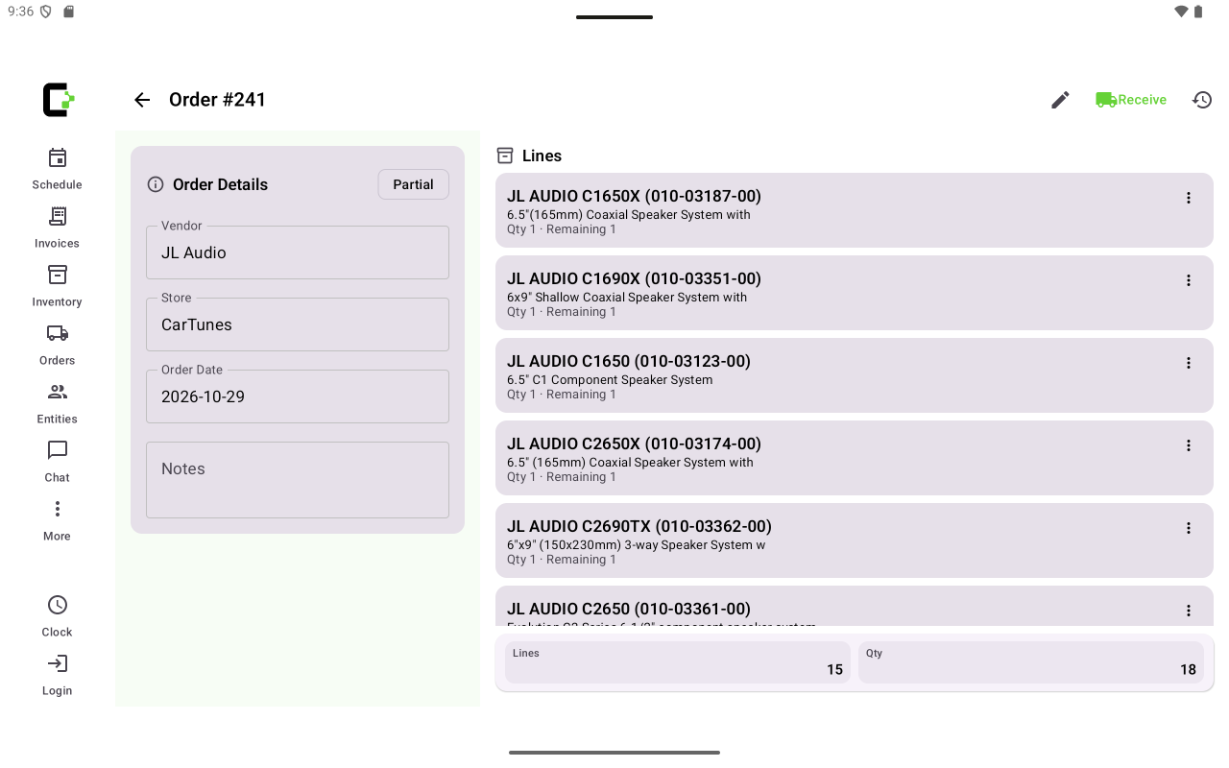
- Partial: at least one shipment or cancellation has been recorded, but some ordered items remain outstanding.
- Completed: every ordered item has been received or canceled. Completion does not necessarily mean every item arrived or that all related payables have been paid.
Commit when the order is ready to track as incoming stock and choose its payment strategy. A committed order's lines are locked, although its notes can be edited. You can decommit before any items have been received or canceled to revise the order: newly created On Order items are removed and previously matched Must Order items return to Must Order. A prepaid order must also be eligible for its payment records to be rolled back.
CHOOSE WHEN TO PAY
Pay upon receipt or prepay
At commitment, choose Pay Upon Receipt or Prepay. Pay Upon Receipt is the default and recommended starting point for the usual shipment-based workflow. CASA creates a vendor payable when goods are received, including applicable shipment freight; paying that payable is a separate payment action. Outstanding items can arrive in later shipments.
Choose Prepay when you pay the vendor in advance. Enter freight and payment details at commitment; available vendor credit can be applied, with cash, card, check, or EFT for any remaining amount. Freight and the payment reference are set at commitment rather than for each later shipment. Canceling prepaid items may require a refund or vendor credit; see canceling backorders.
RECORD WHAT ARRIVED
Receive manually or with a scanner
Open a committed order and choose a receiving method. Record shipment details and review the quantities before submitting; receiving requires the appropriate employee permission. You can receive a portion now and leave the rest on order for another shipment.
Manual receipt
Enter the quantity received on each line. On the desktop, if a product requires serial numbers, use Enter Serial Numbers to assign one to each required item before completing that receipt. The desktop also offers serial entry for items that do not require it. The manual screen provides Cancel Remaining for unfulfilled quantities.
Scanner receipt
Scan each product's UPC to match an outstanding item on the order. The UPC must be registered to the order's vendor and match a product on that order. On the desktop, scan or type the serial number after the UPC when required, then continue with the next item. On Android, scan the UPC with the device and enter the required serial number in the prompt. Review the scanned list and remove mistakes before submitting.
Scanner receipt records the scanned items; use manual receipt to cancel remaining backorders. On the desktop, 12- or 13-digit numeric scans are interpreted as UPCs, so use manual serial entry if a serial number has that form.
HANDLE THE UNFULFILLED
Cancel remaining items and handle prepayments
In manual receipt, select Cancel Remaining on a line to cancel its outstanding balance rather than leave it on order. On the desktop, you can receive part of a line and cancel the remainder in the same operation; review the confirmation before proceeding. A canceled item reserved for an invoice returns to Must Order, while an unreserved item is removed from incoming stock. If other items remain outstanding, the order stays partial.
For a prepaid order, canceling items with a value opens a prefilled refund form after the receipt is saved. Record the vendor's refund or account credit as appropriate; it is not automatically issued by the vendor. If the form is dismissed or cannot be opened, the cancellation is still saved, so follow up to record the compensation separately.
KEEP COSTS CURRENT
Save vendor and sheet costs
The Add Order Line window lets an authorized employee save the entered cost back to the selected inventory vendor model or save the sheet cost to the inventory model. The order line table's right-click menu also provides actions to save a selected line's costs or save applicable costs for all lines.
These are deliberate catalog updates, not just edits to one order: review the values and selected records before saving. Vendor cost describes what that supplier charges; sheet cost is a separate model-level basis that can be used for sales commission. Editing inventory costs requires the appropriate permission.
KEEP THE PAPER TRAIL
Notes and order history
Use order notes for the vendor's order number, purchasing instructions, or other metadata your team will need later. Notes are searchable in Orders, making it easier to find an order from a vendor reference. Notes on a committed, incomplete order can be updated without changing its lines.
Search orders by vendor, store, date, and status to follow open purchasing work. The vendor entity's Order History shortcut starts with that vendor and the last 365 days; adjust the date filter for older orders. Shipment history helps you review what was received or canceled over time.
RETURN ORDERS
Send physical items back to a vendor
A return order tracks individual physical items your store sends to a vendor, such as a defective amplifier or available merchandise the supplier has agreed to take back. It records the items, reasons, and the compensation received for each. This is a return to a vendor, not a customer's return on a sales invoice.
IDENTIFY WHAT IS GOING BACK
Select the vendor, store, and items
Create a return order for the vendor and the store shipping the items. In Add Items, search the itemized stock for the actual items being returned; the picker uses that vendor and store and starts with Defective selected. Change the status filter to include Available or On Display items when appropriate. Model, vendor model, UPC, and serial number filters help identify the correct physical item.
Items must be at the shipping store, in one of those three statuses, and not already on another open return order when the return is committed. The picker can include anonymously added items; confirm their provenance and the vendor's return agreement before adding them. Add a reason for each item and save the draft. Creating and committing orders requires the appropriate employee permission.
DISPATCH AND TRACK
Commit the return and receive its outcome
A saved return is a draft and does not yet change the items' stock status. Once the items have officially been returned to the vendor, Commit the order. CASA marks each item Returned, removing it from on-hand stock, and records the return in its history. Commit tracks the dispatch in CASA; it does not itself ship the goods or guarantee the vendor will approve compensation.
Review the order before committing: the item list is locked afterward, and the current return workflow does not offer a decommit action. Notes can still be edited while the order is open. When the vendor responds, choose Receive Return or Receive compensation and select an outcome for each item being settled. You can receive some items now and handle others later; receiving requires Receive Order permission.
The return is complete only after every item has an outcome, including a denial. A completed return means the outcomes have been recorded, not necessarily that every item was refunded or replaced.
RECORD WHAT THE VENDOR PROVIDED
Compensation methods
Select the outcome the vendor actually provides for each item. Financial methods require a positive amount; enter the vendor's reference number when available so the related payment can be found later.
- Account Credit: records vendor credit for the entered amount as a credit memo associated with the vendor and store. It can be applied to eligible future vendor payments; it is not cash in the drawer.
- Cash, Card, Check, or EFT: records the corresponding direct refund received from the vendor. Enter the amount for each item. Cash can be associated with an active drawer at the return's store; the desktop uses its default drawer and Android offers a store drawer selection. Recording a payment does not itself transfer money.
- Repaired: the same item comes back from the vendor after repair. CASA changes that item's status from Returned to Available.
- Replaced: the vendor sends a replacement. CASA keeps the original as Returned and records the incoming replacement, normally as Available. If a matching Must Order item exists for the same model and store, the replacement can satisfy it and become Committed instead. Enter the replacement serial number when the model requires one, and provide shipment details.
- Denied: the vendor does not compensate the item. CASA records a write-off based on the returned item's cost and quantity; the item remains Returned, rather than automatically going back into stock.
KEEP THE RETURN VISIBLE
Follow up on outstanding items
Use order notes for return authorization numbers or vendor instructions, and search Orders or the vendor's Order History to find the return. Item status history and the return's recorded compensation help explain what left the store and how the vendor resolved it. Keep following up on items without a compensation method even when other items on the same return have been settled.
TRANSFER ORDERS
Move inventory between stores
Transfer orders track stock moving from one CASA store to another. Build a transfer from stock at the source, commit it when the goods are dispatched, and receive it at the destination. CASA tracks the in-transit items separately from stock that has physically arrived.
START WITH STOCK ON HAND
Choose source and destination
Select different source and destination stores and add inventory lines. The source must have enough eligible stock when you commit; stock that is merely On Order at the source is not available to dispatch. The line window shows source and destination stock, safety stock, and sales information to help you decide what to move.
For standard items, CASA can use source items in Available or Defective status. You can specify particular physical items; on the desktop, serialized items require selection. For bulk, the source must have enough Available units. Committing checks stock again, so a saved draft is not a reservation and stock may have changed since the line was added.
COUNT PACKS AND UNITS
Transferring bulk inventory
For bulk lines, Transfer Qty is the number of destination item records or packs, and Unit Qty is the number of sellable units in each. For example, Transfer Qty 2 and Unit Qty 50 moves 100 feet of wire as two 50-foot destination items. Receive and cancel quantities count those packs, not individual feet.
At commitment, CASA removes the total units from Available bulk stock at the source, taking from the oldest available records and splitting quantities as needed. It creates new On Order bulk item records at the destination, each with the specified Unit Qty. You cannot specify particular source bulk items for the transfer; the destination records use the inventory model's sheet cost and primary vendor details rather than preserving each consumed batch's individual cost.
TRACK THE JOURNEY
Commitment, status, and store history
Saving leaves an editable draft. On Commit, CASA records the dispatch and locks the transfer lines; this does not physically transport the products. For standard items, the same physical item records move to the destination store in CASA at commitment, and their store history records the change. Available items become On Order while in transit, not Available at the destination yet.
When an ordinary in-transit item is received, it becomes Available at the destination, or Committed if already reserved on a committed invoice there. Bulk destination records follow the same On Order-to-received flow. Defective standard items are intended to be marked Removed during transit and Defective on receipt, but see the limitation above. Inspect item status and store history for the audit trail.
Open transfers can be received in multiple shipments. Once every dispatched item is received or canceled, the transfer is complete. A completed transfer can include canceled items; it does not prove that everything arrived.
OPTIONAL STORE ACCOUNTING
Create an interstore balance
When committing, choose whether to create an interstore balance. Choose No to move stock without creating a financial balance. Choose Yes and enter a positive amount to create an open accounts receivable for the source store and a matching open accounts payable for the destination store. These are records of what the stores owe each other, not an actual transfer of money; settlement is handled separately.
The prompt starts with the transfer's sheet-cost total plus freight, but the amount can be changed. Review it carefully: the current line subtotal multiplies sheet cost by Transfer Qty without multiplying bulk Unit Qty. If sheet cost is per sellable unit, calculate the appropriate bulk value before accepting the balance. The open records are initially due in 30 days.
CONFIRM THE ARRIVAL
Receive manually or by scanner
At the destination, open the committed transfer and record the shipment with Receive Order permission. For manual receipt, enter the received quantity for each line. If particular items were specified, the desktop can ask which items arrived when receiving only part of the line. Leave items that have not arrived outstanding for a later shipment.
For scanner receipt, scan the UPC of each dispatched item or bulk pack and review the resulting list before saving. CASA matches the barcode to an unsettled item on this transfer. Existing serial numbers carry over with standard items; when required and missing, the desktop scanner workflow can prompt for one. A UPC identifies a product, not necessarily which serial-numbered unit is in hand, so compare the displayed serial with the physical item.
HANDLE A SHORT SHIPMENT
Cancel the remaining items on a line
In manual receipt, choose Cancel Remaining for a line when its outstanding items will not arrive. On the desktop, you can receive part of the line and cancel the remainder in the same submission. The canceled items are settled on the transfer: an unreserved item becomes Removed; an item reserved for a committed destination invoice is intended to return to Must Order so the demand can be filled another way.
Scanner receipt is for scanned items; use manual receipt to cancel remaining quantities. Review the shipment and canceled counts before saving, especially for bulk packs, where one canceled item represents its full Unit Qty.
INVOICES
One workflow, from quote to sale
Build a customer's job with the products, labor, vehicle, and scheduling details your team needs. Save it as an estimate, commit inventory when the job is ready, and complete the sale when the balance and fulfillment requirements are met.
THE BIG PICTURE
Estimate to completed sale
Save an invoice to keep it as an estimate without committing inventory. Reopen it as the customer makes decisions, update the details, and save again.
On desktop, drag and drop invoice lines to arrange them, or sort the line table using a column header. Saving the invoice records the current line order, including a column sort; review it before saving. See desktop table controls.
When the customer is ready, commit the invoice to reserve the items for the job. CASA checks availability and may ask you to approve using display stock, reserving items already on order, or creating must-order items. A store can also require a payment before commitment.
Once the balance is settled and the required items are ready, complete the invoice to close the sale. Decommitting releases committed inventory and removes its must-order items; review the job before doing so.
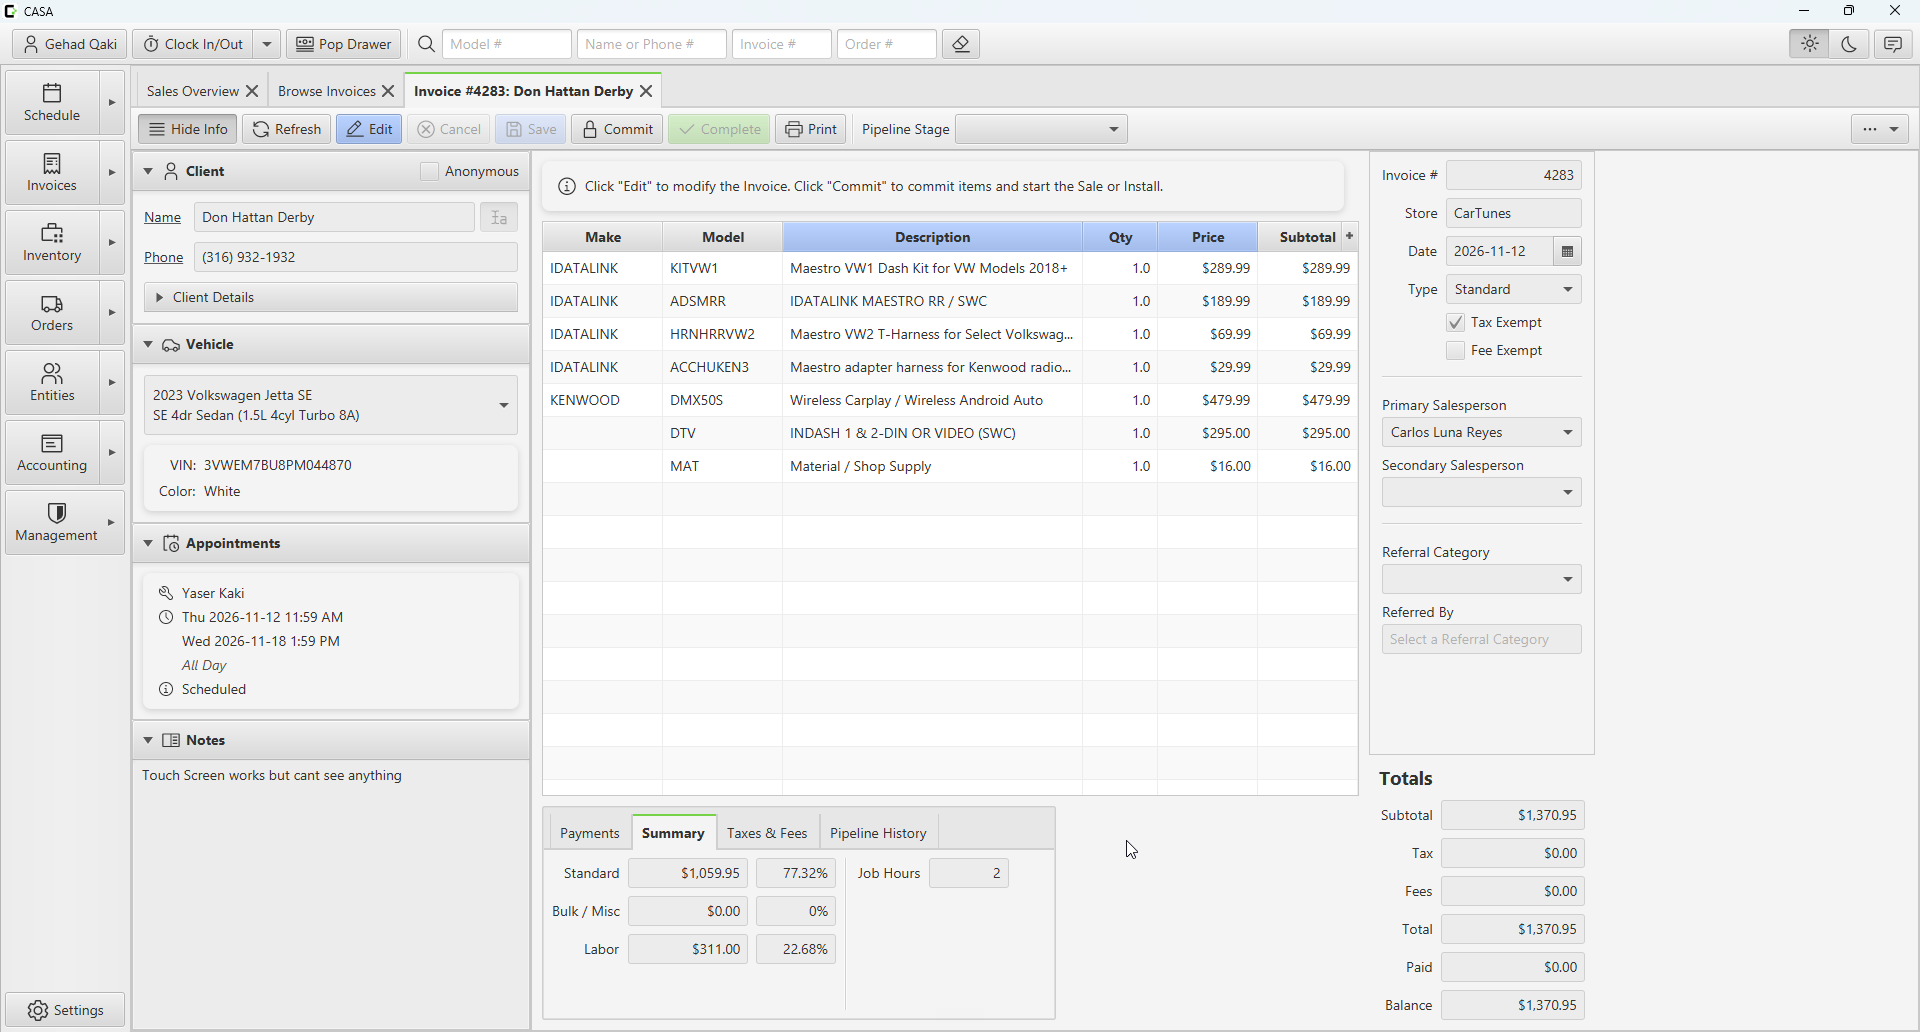
SET THE RIGHT CONTEXT
Invoice type, salespeople, and workflow fields
Choose an invoice type
The invoice type determines the default price level used when adding inventory items:
- Standard uses the item's retail price and applies an active promotional price when available.
- Warranty prices inventory lines at zero.
- Sheet Cost uses the item's sheet cost.
- Cost uses the item's unit cost.
Sheet Cost and Cost invoice types require the employee to have permission to view costs. When changing the type on an invoice with existing inventory lines, CASA asks whether to update their prices. Updating removes inventory-line discounts; miscellaneous lines are left unchanged. Warranty lines become zero-priced. If a sheet or vendor cost is missing, CASA falls back to the available vendor cost, sheet cost, or existing line price as appropriate.
Give sales credit accurately
A new invoice starts with the logged-in employee as its primary salesperson. If a third-party application created the invoice without a primary salesperson, the first employee who opens it for editing is assigned as primary. A second salesperson must be selected manually in the secondary salesperson field; CASA does not automatically add another employee.
Changing an existing salesperson assignment requires the employee's Edit Salesperson permission. The same employee cannot be both the primary and secondary salesperson. Accurate attribution helps the shop identify who handled each sale.
Referral category and invoice pipeline
Use the referral category together with the referral source to record how a customer found the shop. If a referral source is entered, a referral category is required. Consistent categories make lead sources easier to compare and report.
The invoice pipeline is a configurable set of stages for tracking a job's progress. Pipeline history records stage changes and who made them. Stages can require the invoice to be saved, committed, or completed; CASA can prompt you to perform the required transition before accepting a stage. This gives the team a shared view of the sales and work queue.
KNOW THE CUSTOMER
Find a customer and their vehicle
Search for an existing client by name or phone number and select the matching record. On desktop, name suggestions begin after three characters and phone suggestions after five digits. Selecting the client brings their information into the invoice and lets you choose from their existing vehicles.
Add a vehicle manually when needed, or enter its VIN and decode it to help populate vehicle details. The Android app can scan a VIN barcode. For shops subscribed to the optional license plate decoding add-on, enter the plate and state to look up the VIN and decode the vehicle. Review the returned information before saving.
PLAN THE WORK
Appointments and saved notes
Add multiple appointments to an invoice when a job needs multiple time slots or technicians. Each appointment carries its own technician and schedule, and can be edited or removed. Appointment status helps the team see whether a job is scheduled, checked in, missed, or canceled.
Some labor items are configured to require an appointment before commitment; labor configured to require a vehicle prompts you if none is selected. Use invoice notes to share job details, and choose Saved Notes to search your store's reusable notes. Append a note to the existing text or replace it, then edit as needed.
BUILD THE JOB
Add items, packages, and more
Type a model in the invoice's model field and choose a suggestion. On desktop, suggestions start after three characters and match both the main inventory model and any vendor models; a vendor-model match still selects the underlying inventory item. Main-model matches are ranked ahead of vendor-model matches.
For a quick counter sale, type or scan a UPC in the model field. CASA looks for an inventory item and then a package. A connected barcode scanner can submit the code on desktop; the Android app also offers a camera scanner for UPCs.
Add a package to bring its configured lines into the invoice together. Use Add Misc for an item not in inventory, and sell a gift certificate as account credit for the recipient: select an existing client or create the recipient when adding it. Line quantities, prices, discounts, and applicable exemptions can be reviewed as you build the job.
When an item's promotion has a price and its end date has not passed (and any start date has arrived), a Standard invoice automatically shows the promotional price as a discount from the regular price. Outside the promotion dates, the standard item price applies. Other invoice types use their selected price level instead of the standard promotional price.
DON'T FORGET THE DETAILS
Required and optional associations
Inventory associations help the salesperson remember related products or labor, such as a harness or installation accessory. When a positive-quantity associated item is added, CASA displays its associated items with their reason, quantity, availability, and price.
- Required associations are included when you choose Add Items; the Back to Invoice button is disabled when required items are present.
- Optional associations are only added when you select their checkboxes. If there are no required items, you can return without adding optional ones.
Selected items are added using their configured association quantities. Review the resulting lines and availability for the particular job.
KEEP THE JOB MOVING
What is a must-order item?
A must-order item represents a quantity needed for a committed job that still needs to be ordered. When available inventory and other approved sources do not cover the job, CASA can ask for approval to create must-order items. The invoice shows a Must Order status while these items remain outstanding.
For an automotive shop, this makes the missing parts visible instead of leaving the need buried in a quote: purchasing can see the demand and the team can follow the job as the parts are ordered and received. A saved estimate alone does not reserve stock or create this committed demand.
TRACK THE ACTUAL ITEM
Pick physical items and serial numbers
Use item picking when you want to specify which physical unit is being sold, including its serial number or vendor model. CASA prompts for a selection for items configured to require serial numbers; you can also pick items for a line. Available and display items can be selected, and the picker offers an option to allow excess quantity to become must-order items.
Specifying the actual item helps track its lifecycle, including a later return. CASA prevents the same specified item from being sold twice on one invoice.
UNDERSTAND THE TOTAL
Taxes and line-item fees
CASA calculates configured taxes and shop fees against eligible invoice lines. For inventory items, the active taxes and fees assigned to the item must also be configured for the store; miscellaneous lines use the store's configured defaults. Invoice-level and line-level tax or fee exemptions can remove the corresponding charges. Review the breakdown and exemptions for the customer and transaction.
A percentage rate applies to the eligible line total; an amount rate applies per unit. A configured minimum can apply to a positive percentage charge, and each tax or fee is rounded to cents in the invoice totals.
Line-item shop fees are distinct from card processing fees. A shop-fee exemption does not automatically exempt a separate card processing fee.
Learn how to configure these rules in the taxes and fees guide.
FINISH WITH CONFIDENCE
Payments and completion
Add payments to the invoice and review the paid amount and remaining balance. If the store has card processing fees enabled and they apply to the payment, CASA displays the fee and includes it in the invoice's fee breakdown and total. Check the final charge before taking payment.
Settle the updated balance before completing the invoice. If items are still unreceived, completion may have to wait. The invoice also keeps an action history so the team can see important changes to the job.
SCHEDULE & CALENDAR
Appointments and standalone calendar events
CASA's schedule brings together two kinds of calendar entries. An invoice appointment is attached to a customer job: it can show the customer, vehicle, invoice status, and job notes, and it is managed from that invoice. A generic calendar event is a standalone entry for shop or team planning. It has a title, time, optional technician, and notes, but no invoice or customer record.
Both kinds appear on the desktop schedule. A generic event can be assigned to a technician or left unassigned; invoice appointments are tied to the invoice and its technician assignment. Use generic events for things such as meetings or shop closures, and invoice appointments for customer work that should remain connected to its estimate or sale.
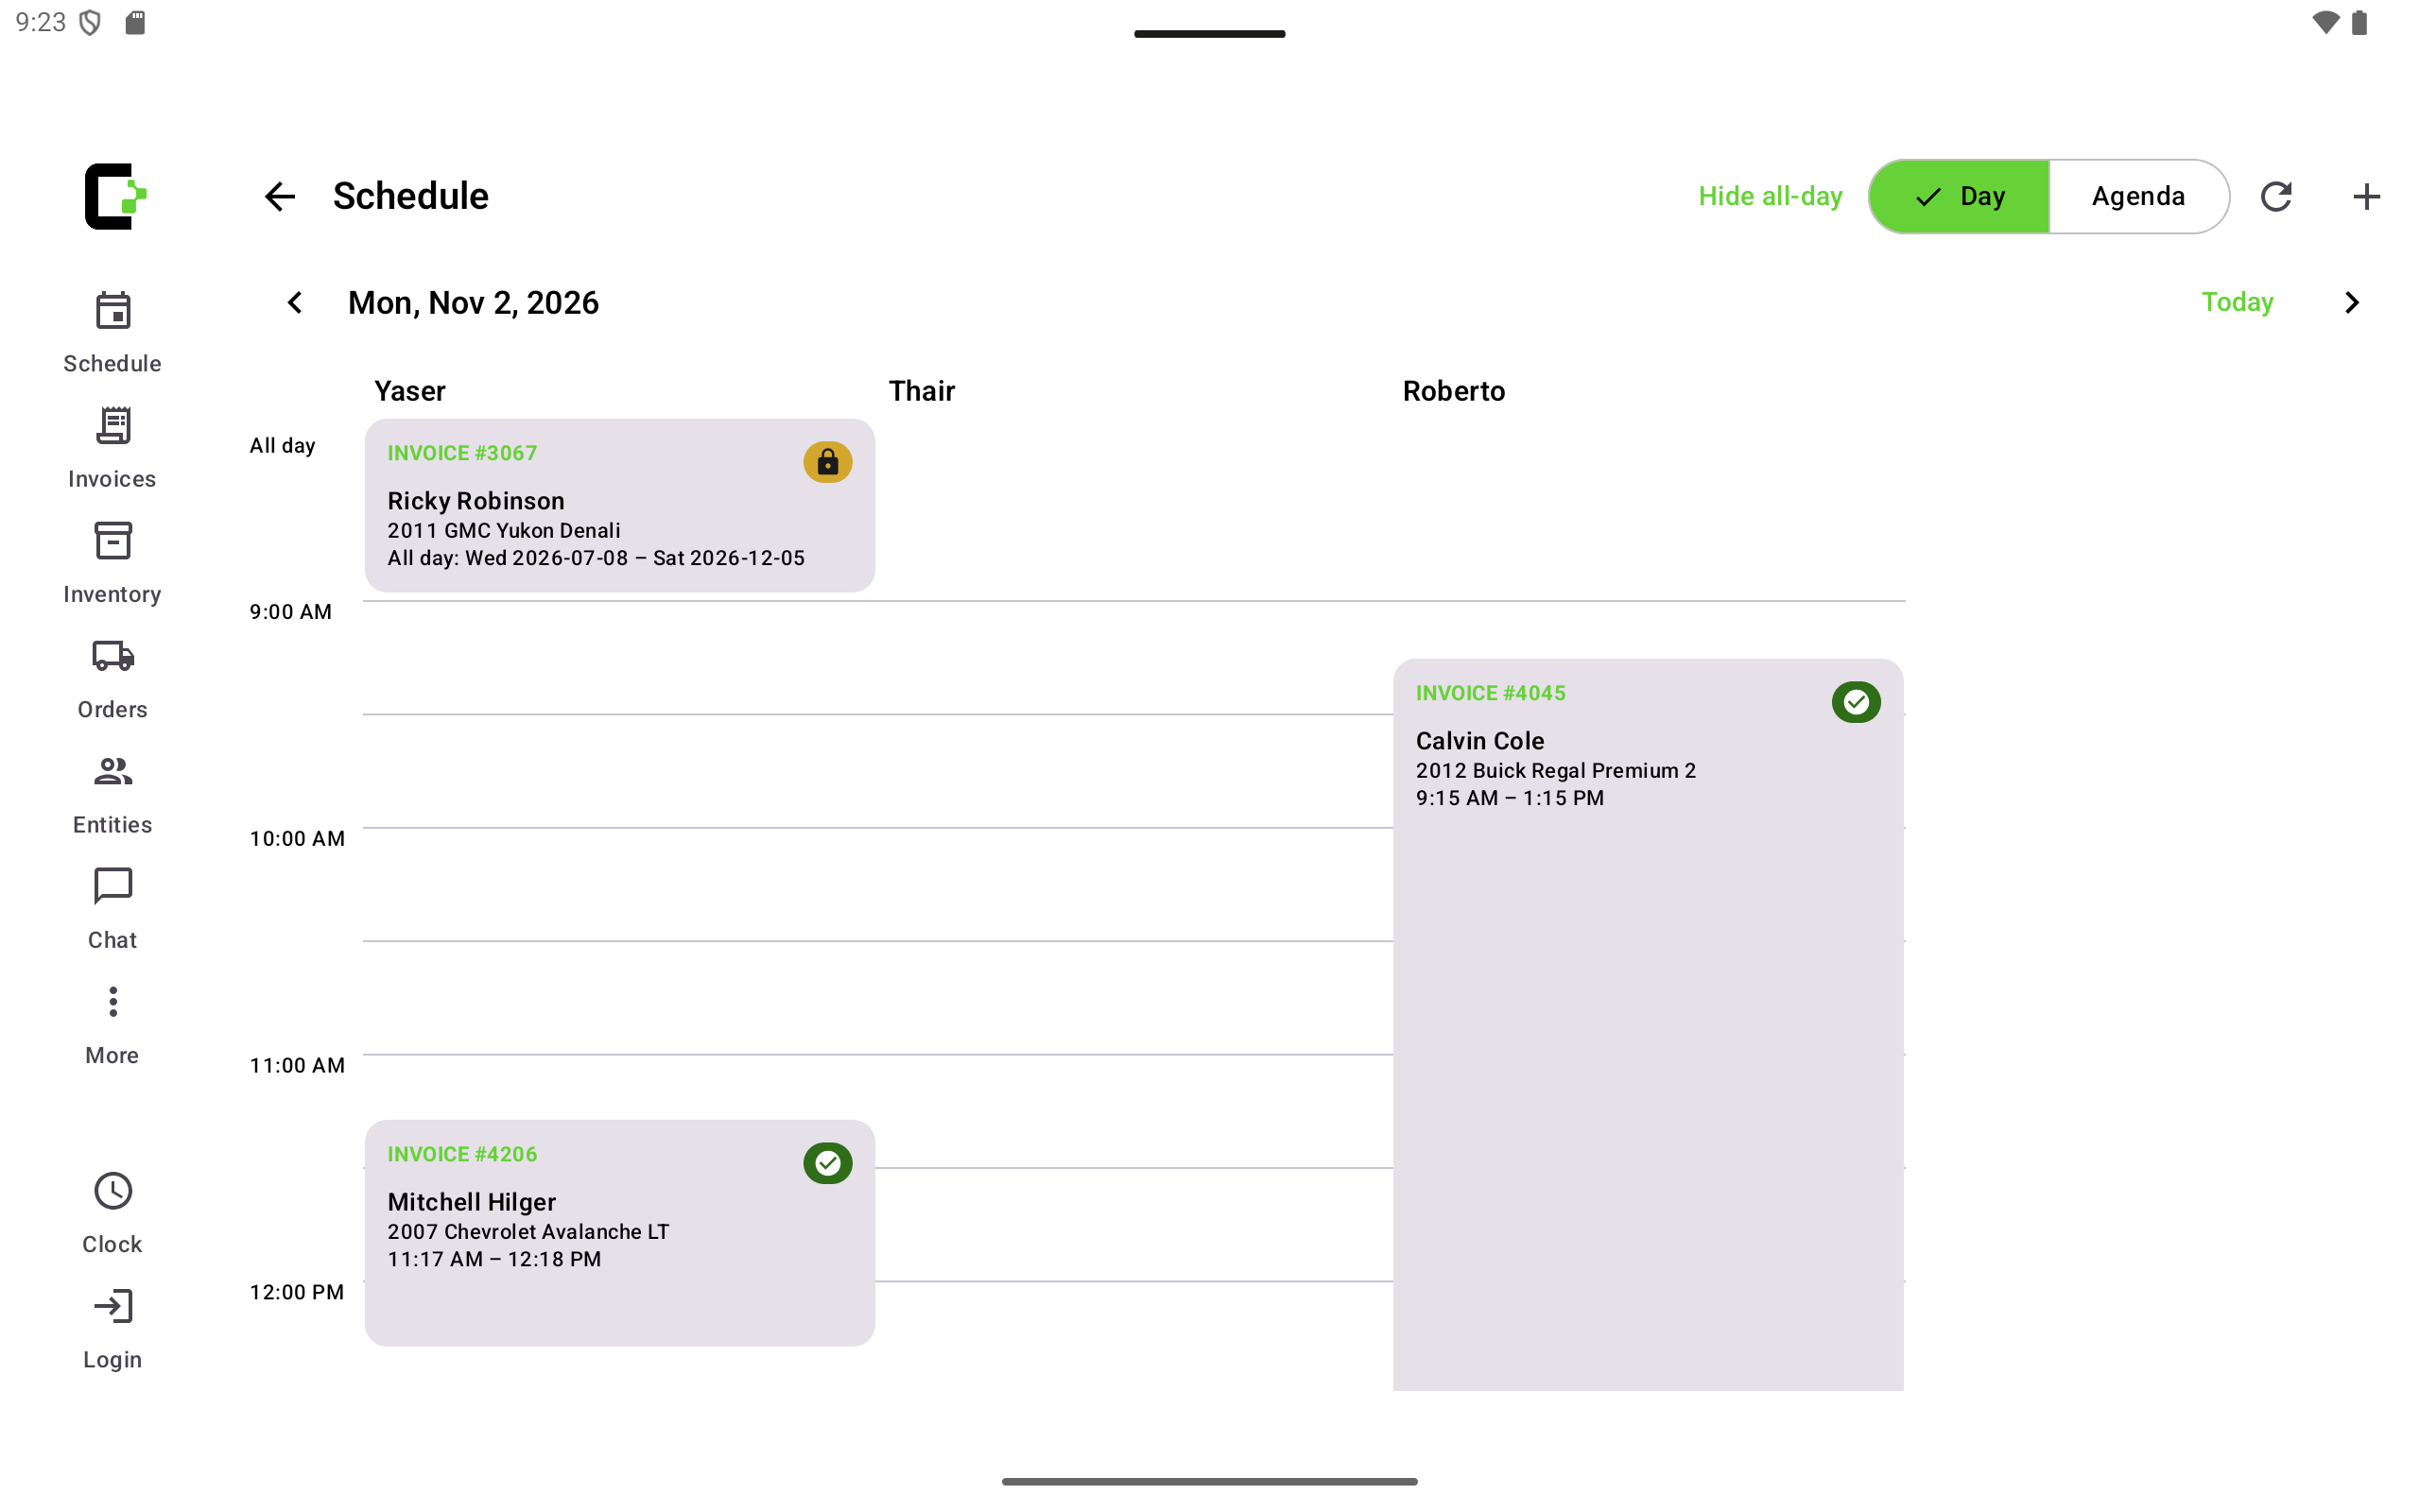
PLAN REPEATING EVENTS
Recurring generic calendar events
On desktop, create a generic event by selecting a calendar time or an all-day area, then set its title, start and end, optional technician, and notes in the event popover. Turn on Recurring to configure a repeat rule in the recurrence panel, then save. This is useful for regular staff meetings, recurring blocks, or other events that should appear repeatedly without being attached to a customer invoice.
Recurrence applies to generic events, not invoice appointments. Customer appointments are created and edited through the invoice so the scheduled work stays linked to that job.
READ THE CALENDAR AT A GLANCE
Appointment status and invoice status icons
On desktop, invoice appointment titles include a status symbol so the team can quickly distinguish a saved estimate from active or completed work. The cues include 💾 for an uncommitted saved invoice, 🔒 for a committed invoice, 🛠️ when labor is in progress, and ✅ when the invoice is completed. Appointment-specific statuses can also show 📍 for checked in, ❓ for no show, or ❌ for canceled.
These are combined cues: invoice completion and work-in-progress take precedence, then checked-in, no-show, or canceled appointment status, followed by committed or saved invoice status. A 📝 marker indicates that either appointment notes or invoice notes are present. Click the appointment to inspect both the appointment status and the invoice details.
GET THE JOB DETAILS WITHOUT LEAVING THE CALENDAR
Invoice appointment popover
Click an invoice appointment on the desktop calendar to open its schedule popover. It shows the invoice number, customer name and phone numbers, vehicle, appointment time and technician, and the appointment's status and notes. It also shows invoice notes and key financial metadata: subtotal, tax, fees, total, amount paid, and remaining balance. Use Open Invoice to jump into the full invoice.
From the popover, authorized employees can update the appointment time, technician, full-day setting, status, appointment notes, and invoice notes. The financial summary is context for the schedule; edit the underlying invoice to change its lines or amounts. Standalone generic events have a separate popover for their title, dates, notes, technician, and recurrence.
SCHEDULE CUSTOMER WORK
Add one or more appointments to an invoice
In the desktop invoice editor, choose Add Appointment to open the appointment form. Select a technician, start and end date and time, and whether it is all day; add appointment notes and choose the appointment status as needed. Save the appointment to the invoice. An invoice can have multiple appointments, each with its own technician and time, which is helpful when a job needs separate visits or several technicians.
The form also supports appointment reminders when the CASA Messaging add-on and store settings are available. If labor on the invoice requires an appointment, the invoice cannot be committed until at least one appointment is added. Scheduling time reserves a place on the calendar; it is separate from recording actual technician labor time.
CHOOSE A TIME VISUALLY
Desktop drag-and-drop and Android time picker
On desktop, the invoice appointment form's Schedule Appointment option opens a resource calendar with technicians and their existing appointments. Drag to select a time range for a technician, then confirm. CASA fills the technician, dates, and times back into the appointment form; save the form to attach the appointment to the invoice. You can also move an existing calendar entry to a different time or technician by dragging it on the schedule.
On Android, use Pick a time from the schedule in the appointment form. Choose a day, technician, and one-hour start slot; CASA fills in the technician and date/time for the appointment. The picker displays how many appointments are already scheduled at each displayed start time, so use that information to avoid conflicts.
MAKE THE RIGHT CALENDARS VISIBLE
Technicians and store calendar settings
Only an active employee marked as a Technician appears as a technician on the calendar. A technician must also be assigned to the store to appear on that store's schedule. If a team member is missing, check those employee settings first.
Each store controls its own calendar hours, all-day display, unassigned-event visibility, and technician display names and ordering. These settings were covered in Stores: scheduling and other store data; employee calendar setup is described in Employees: technicians and their calendars. CASA devices use their default store's schedule and time zone.
CASA CHAT
Two-way conversations inside CASA
CASA Chat lets your team send and receive text messages with entities such as customers and vendors, keeping conversations alongside the work your shop already manages. Open a chat from an entity or an invoice to contact the entity or the invoice's client, review the conversation, and reply without switching to a separate texting app. The chat list shows recent activity and unread messages.
Chat requires the CASA Messaging add-on and an enabled messaging setup. Use a valid recipient phone number and an active employee sign-in. Conversations use a store context: a new entity chat starts with the device's default store, while an invoice chat uses the invoice's store. A recipient who has opted out cannot be sent further messages through CASA.
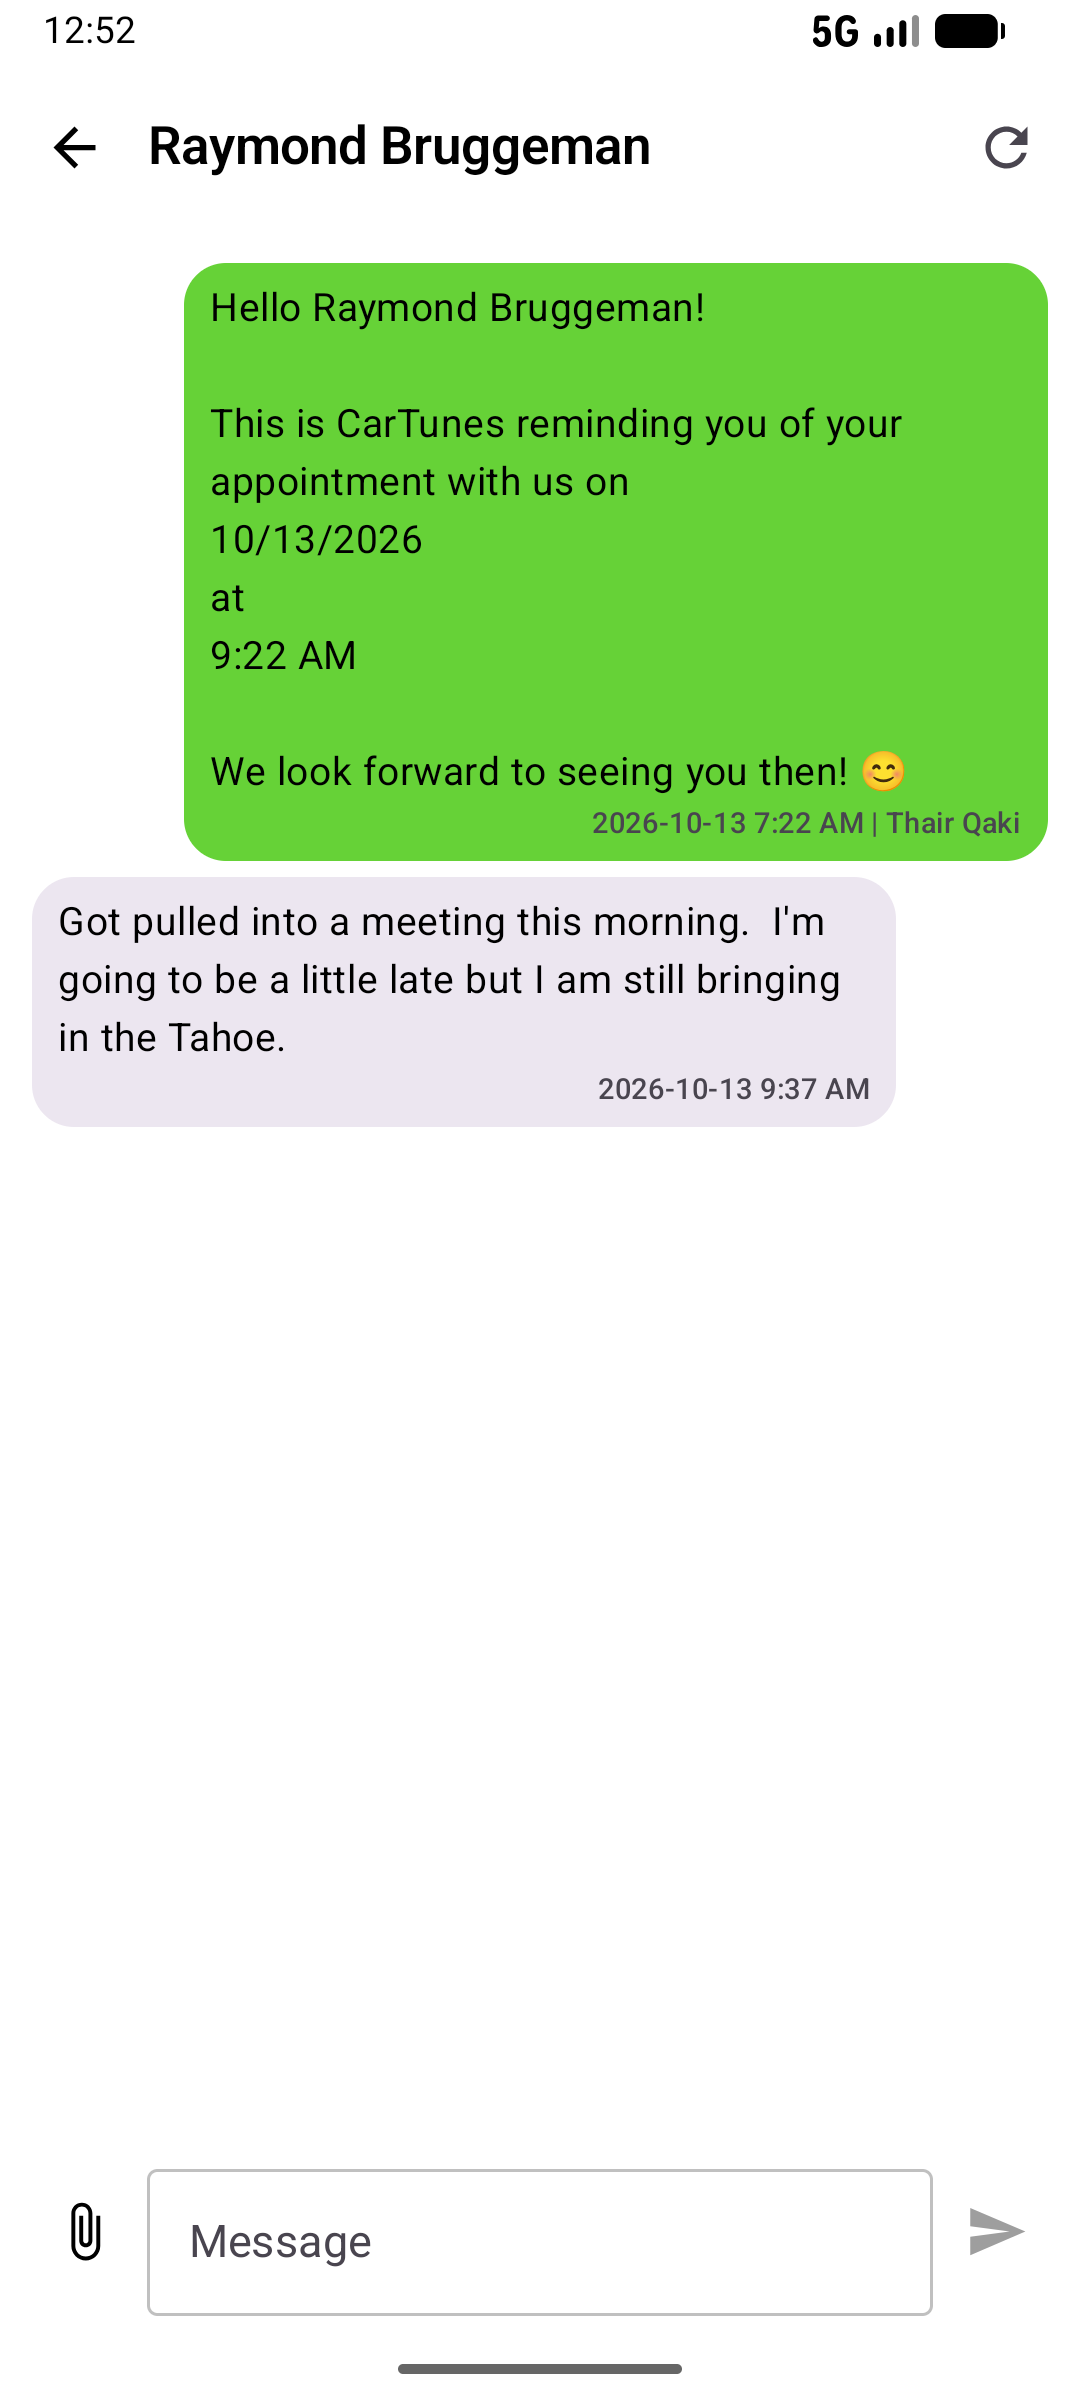
SHARE WHAT THE CUSTOMER NEEDS TO SEE
Attachments, share links, and incoming media
Share photos, documents, and videos to explain a repair, show a product, or provide other context. On desktop, select Attach in an open chat and choose supported images (JPG, PNG, or WebP), PDFs, or MP4/MOV videos. CASA uploads the files and inserts a share link into the message draft; review the message and send it separately. The recipient opens the link to view the files, so only share material appropriate for that recipient.
Desktop allows up to 10 files per attachment selection, with a 20 MB limit per image or PDF, 50 MB per video, and 150 MB total. On Android, the chat composer can send a selected attachment with the message. Incoming messages can include media too: view available image previews or open an attachment from the conversation. These are different workflows: a desktop-generated share link is not the same as a native media attachment.
SAVE TIME WITHOUT LOSING THE PERSONAL TOUCH
Message templates and store settings
Use desktop Chat Settings to create, edit, or delete reusable named message templates for frequent updates and follow-ups. Open a conversation and insert a template into the draft; review or personalize it before sending or scheduling. Supported placeholders can fill in the entity's full or first name and the employee's full or first name.
Chat Settings uses the device's default store and requires the Open Settings employee permission. The store's appointment reminder text, reminder offsets, and default for new appointments are configured separately from general message templates. Confirm the selected store before saving: reminder settings apply to that location. Message templates created in the desktop settings are associated with that store.
HELP CUSTOMERS REMEMBER THEIR VISIT
Appointment reminder templates and automatic reminders
In Chat Settings, write the store's Appointment Reminder Template and set one or more offsets in minutes before the appointment. For example, 1,440 minutes is one day and 120 minutes is two hours; an enabled appointment can have a reminder scheduled for each applicable offset. The reminder template supports entity and employee names, store name, appointment date, start time, and end time. Use the placeholder picker to add those values to the message.
On desktop, the store setting Default new appointments to SMS reminders enabled turns the reminder option on by default for new invoice appointments; staff can change it on the appointment. Existing appointments retain their own setting. The appointment form previews the message and planned times and allows a custom message override for that appointment. Android also exposes an SMS Reminder switch and optional message override on invoice appointments; check the switch for each appointment.
Reminders need the Messaging add-on, a client with a valid phone number, a configured reminder message and offsets, and an eligible future appointment with reminders enabled. On desktop, offsets already in the past or within 15 minutes are omitted when scheduling from the appointment form. Saving an appointment is not confirmation of delivery: desktop schedules in the background, and scheduling errors do not block the save. Review scheduled messages and investigate any missing reminder; delivery can also depend on recipient opt-out and messaging service availability.
PLAN THE FOLLOW-UP
Schedule and review messages
Instead of sending immediately, use the chat composer to schedule a message for a later date and time. On desktop, View Scheduled Messages lists pending scheduled messages, including appointment reminders; search by entity or content, review a message, edit its text or send time, or cancel it before it is sent. Check the scheduled message and conversation rather than assuming a queued message has been delivered.
For more on creating the related visit, see invoice appointments and the calendar scheduling tools.
PAYMENTS, BALANCES & CREDIT
One payment ledger for money owed and money received
CASA's Payments area brings together payments and open balances created from invoices, purchase orders, returns, transfer orders, statements, and manual entries. An Open payment records an amount that is still due; a settlement records money, credit, or a write-off applied to one or more open records. This lets a shop track both accounts receivable (money owed to the store) and accounts payable (money the store owes) instead of treating every payment as an immediate cash transaction.
Use payment search to filter records by method, transaction, entity, store, date, amount, balance, reference, and other criteria. The payment record keeps its originating transaction and counterparty, while settlement history shows which open balances a payment was applied to. An invoice's direct payments are covered in Payments & completion; this guide focuses on Payments search and settling balances and credit.
READ AMOUNTS FROM THE STORE'S PERSPECTIVE
Positive and negative amounts
In CASA's payment ledger, positive amounts mean money is coming to the store or is owed to the store. A positive Open balance is a receivable, such as a customer balance due. Negative amounts mean money is leaving the store or is owed by the store. A negative Open balance is a payable, such as an amount due to a vendor.
For example, collecting $100 from a customer is a positive settlement of a $100 receivable. Paying a vendor $100 is a negative settlement of a −$100 payable. The transaction amount and settlement total retain these signs, so a negative total is not an error: it indicates a net payment out from the store. When entering a standalone payment, choose Income or Expense; CASA stores the amount with the corresponding positive or negative sign.
Entity credit uses the opposite sign convention. Positive entity credit means CASA owes credit to that entity (for example, store credit granted to a client); negative entity credit means the entity has credit available with CASA (for example, a vendor credit memo). Payment balances themselves remain store-perspective amounts.
THREE DIFFERENT QUESTIONS
Payment method, transaction type, and entity
A payment's method describes how it was paid, credited, or left due: Cash, Card, Check, EFT, Exchange, Account Credit, Write-Off, or Open. Cash is associated with a store cash drawer. Card records can include card type, network, cardholder, last four digits, and processing-fee details. Not every method is offered in every workflow: for instance, Open is a balance rather than a tender, and Write-Off and Exchange are used in their supported transaction flows.
The transaction type describes what the payment is for or how it was created: Invoice, Purchase Order, Return Order, Transfer, Settlement, Payment Statement, or Manual / None. For example, a check can be a payment on an invoice or a settlement of several vendor balances. The method is Check in either case; the transaction type records the context.
The entity identifies the counterparty when one applies. It may be a client/customer, vendor, or financer; one entity can have more than one of those roles. A transfer between stores instead names the other store. Some payments, such as an anonymous sale or a general manual entry, have no entity. Invoice payments can identify a payer other than the invoice's client, such as a financer. When settling records together, CASA requires them to belong to the same store and the same counterparty.
APPLY A PAYMENT ONCE, TO THE RIGHT BALANCES
Settle open balances and apply account credit
To settle balances, select the open payments for one store and one counterparty, enter the amount to apply to each, and choose a payment method for any remaining amount. You can apply part of a balance or settle it in full. Applied amounts must have the same sign as the balance and cannot exceed its remaining balance: receivables take positive applications; payables take negative applications.
Eligible account-credit records for that same entity and store can be applied alongside open balances. The credit offsets the balance: for example, a client's negative $40 credit memo can cover $40 of a positive receivable, while vendor credit offsets a negative payable. If credit exactly covers the selected balances, no new tender is required. If a remainder is left, record it with a direct payment method such as cash, card, check, or EFT. Open and Account Credit are balance-carrying methods, not tender methods for collecting that remainder.
CASA records one Settlement transaction and links it to each balance or credit it affected. The settlement's signed total is the sum of the applied amounts: positive when the store receives money, negative when it pays out, and zero when credits offset the selected balances exactly. The links preserve a history of both what was settled and which settlement reduced each balance.
UNDERSTAND THE TOTALS VIEW
Payment search and totals
The totals view summarizes records matching the current search filters; it is not a cash-drawer close or a profit report. Desktop calculates totals from the matching rows returned by its payment search. Android requests totals using the same filters without the records-page limit, so its totals cover all matches even when the Records view is paginated. A broad search can include both original payments and their settlement records. When filtering by a specific transaction, the Include Settlements option controls whether linked settlement records are also returned.
Both platforms show the same core measures: Cash, Card, Card Before Fees, Processing Fees, Checks, EFT, Exchange, Account Credit, Write-Off, Collected, Open Balance, Collected + Open, and Available Credit. Payment method totals sum signed payment amounts; Card Before Fees separately sums the pre-fee card amounts, and Processing Fees sums recorded card-processing fees. Open Balance is the remaining balance on Open records. Collected + Open combines collected amounts with those remaining open balances.
Collected sums signed amounts for non-Open records, excluding credit memos classified as available credit. Available Credit is the remaining balance on those credit memos, not cash collected; this includes standalone account-credit entries and positive account-credit payments associated with purchase or return orders. Other Account Credit activity, such as credit used on an invoice or purchase prepayment, appears under Account Credit and contributes its signed amount to Collected. The totals therefore classify credit by its transaction source as well as its method. Refunds, vendor payments, and other expenses can make a method or combined total negative. On desktop, the individual total fields can be shown or hidden from the totals menu; Android presents them in a grid.
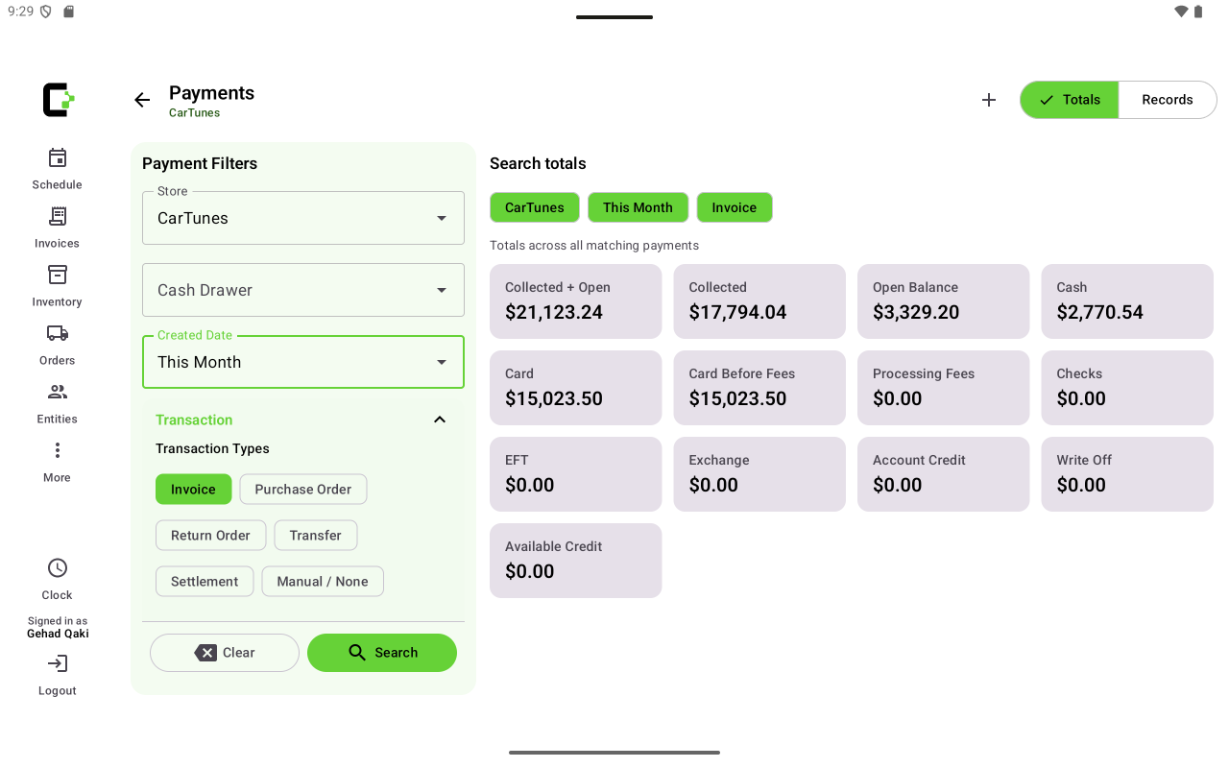
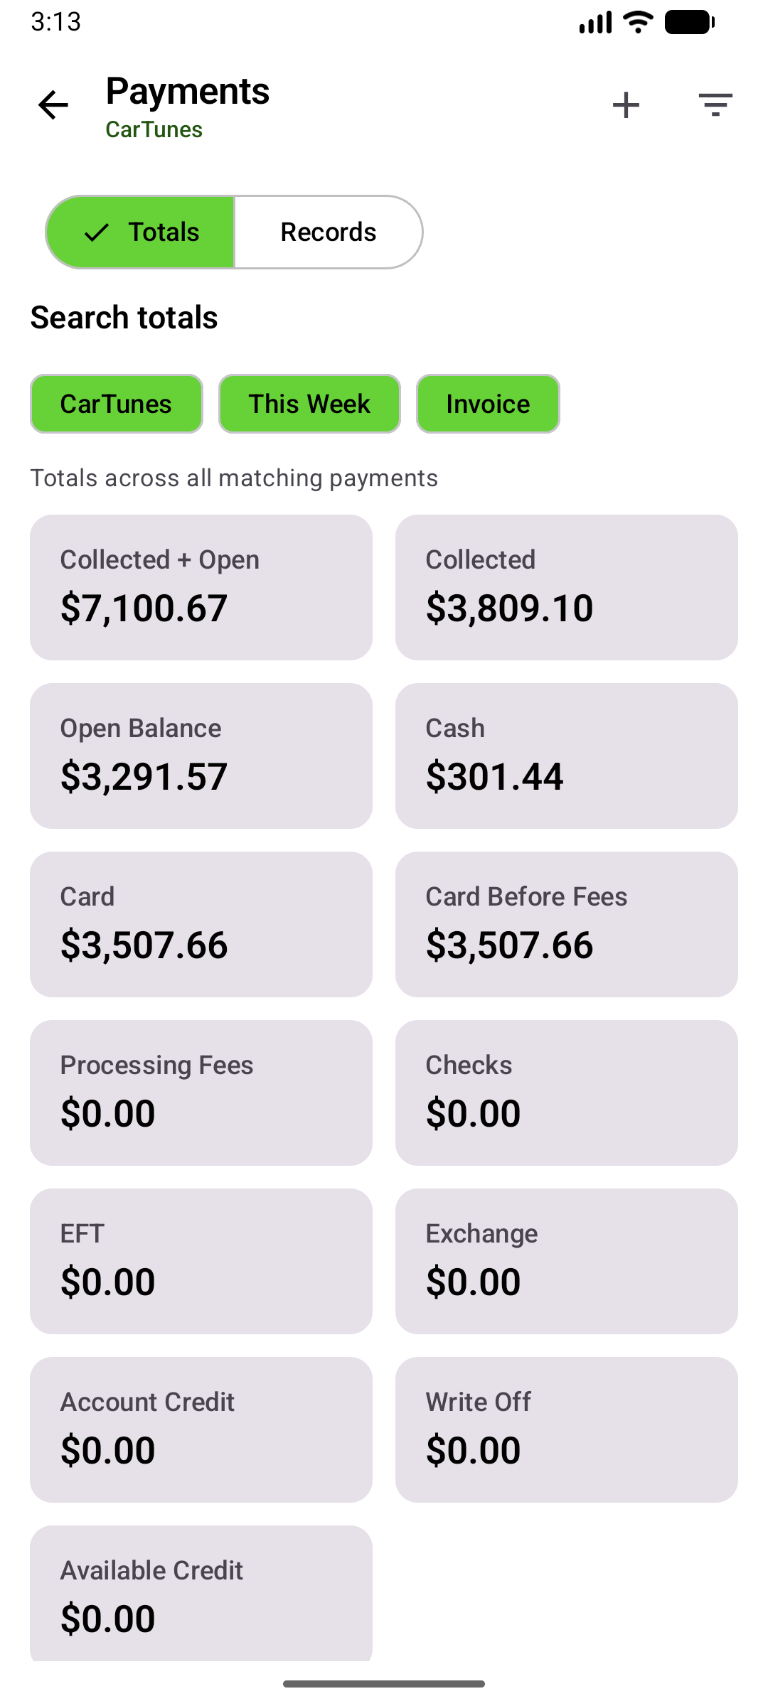
KEEP THE AUDIT TRAIL ACCURATE
What can be edited after a payment is created?
On desktop, an employee with Edit Existing Payments permission can open a payment and update its method, reference number, notes, due date, remaining balance, and, for card records, card type, card network, cardholder name, last four digits, and expiration date. The payment amount, amount already paid, store, counterparty, and originating transaction are read-only. The Android payment search currently provides records and totals, not this edit workflow.
Changing a method is subject to safeguards. A card payment with a processing fee cannot be switched to another method, and a balance-carrying payment (Open or Account Credit) cannot be changed to or from another method once it is linked to a settlement. Editing the remaining balance is a direct adjustment and can write off a remainder without creating a separate Write-Off transaction, so use notes and your shop's accounting procedures to document the reason. Adding or deleting payments is a separate action from editing; completed-invoice payments can still be edited, but CASA blocks adding or deleting payments once the invoice is completed.
PRINTING & DOCUMENT PREVIEWS
Make each document fit its audience
CASA's desktop print previews let your team review documents before printing or emailing them. Invoice, order, and payment-list previews offer different visibility choices so you can focus on the information the recipient needs. Change a setting and inspect the preview, including every page, before sending it. Desktop previews also provide page navigation and zoom.
For invoice, purchase, return, transfer, and payment-list previews, Save as Default remembers the selected visibility settings and number of physical copies on that computer. Check preview saves its layout and stub options separately. Defaults are a starting point, not a substitute for checking each document; they do not change the underlying invoice, order, or payment records.
CONTROL THE CUSTOMER-FACING DETAIL
Invoice and estimate print preview
Choose Print As: Estimate or Invoice and Print For: Client or Billing Entity. Print As changes the document presentation; it does not commit or complete the job. Print For changes how open payments and the balance are presented. For example, an amount billed to a separate financer can be shown as coverage in the client view, while the billing-entity view treats it differently. Review the actual billed-to and balance sections for the recipient.
Choose invoice-line columns such as make, model, UPC, serial numbers, type, description, quantity, sold-by unit, price, discount, final price, and subtotal. Separately control appointment dates, times, technician and notes; primary and secondary salespeople; vehicle and invoice notes; and whether tax and fee names and rates are broken out. The document can still show client and vehicle details, totals, billing information, store policies, and a captured signature. Discounted invoices may initially enable price and discount columns even when defaults were saved.
This flexibility matters in an automotive shop. For example, a quote being compared with competitors may need a clear job description and total without displaying the shop's exact part models or UPCs. A copy sent to a dealership or financer might omit internal appointment or vehicle notes and salesperson names, while a customer's final invoice may include serial numbers and item detail for their records. Confirm that the remaining description, package presentation, notes, and totals do not reveal information you intended to leave out.
Desktop can print, email the PDF, capture a customer signature, or print a receipt when the receipt printer is configured. With the Messaging add-on and a client phone, Chat Link creates a link to the current PDF for the customer chat. Android also offers invoice PDF options, preview, signature capture, and PDF sharing. See Print as Package for how package lines can be combined on the printed invoice.
COMMUNICATE THE ORDER CLEARLY
Purchase order print preview
The purchase order preview shows the vendor and the destination store's ship-to information. Select the line columns to include: make, CASA model, vendor model, UPC, type, description, quantity, cost, and subtotal. A vendor may need its own model number and quantity more than the shop's internal model code. The document also includes order notes when present.
The line count is shown; total quantity appears when Quantity is selected, and the order total appears when either Cost or Subtotal is selected. Hide both Cost and Subtotal if the recipient should not see the monetary total, then inspect the preview and notes for other sensitive information. Print or email the resulting PDF from the preview; see purchase orders for the ordering workflow.
DOCUMENT WHAT IS GOING BACK
Return order print preview
The return preview identifies the vendor and store and can include CASA model, vendor model, UPC, serial number, return reason, and item cost. For a warranty return, including serial numbers and reasons helps the vendor identify the physical items and why they were returned. Order notes are also printed when present.
The item count is shown; selecting Cost also shows the return total. If the recipient does not need costs, turn off Cost and check the notes before printing or emailing the PDF. For the underlying return and compensation workflow, see return orders.
KEEP BOTH STORES IN SYNC
Transfer order print preview
The transfer preview identifies the sending and receiving stores and lets you choose make, model, type, description, quantity, cost, and subtotal columns. A packing copy can emphasize product identification and quantities; a more detailed copy can include cost information for an internal review. Transfer notes are printed when present.
The line count is shown, quantity totals appear when Qty is selected, and the monetary total appears when either Cost or Subtotal is selected. To omit that total, clear both monetary columns and review the notes. Print the preview or email its PDF; see transfer orders for how stock moves between locations.
PREPARE A VENDOR PAYMENT
Check printing
When settling accounts payable, Print Check is available for a negative total paid by Check after selecting the balances to pay. You can also print a check from an existing negative check payment. Choose Single Top Check or Single Centered Check, and decide whether the stub includes transaction information and payment notes. Save those layout and stub choices as defaults for this computer.
Review and, if necessary, adjust the printed amount, payee name, and payee information lines in the preview. CASA overlays the date, amount, amount in words, and payee details on preprinted check stock; choose stock matching the layout and verify alignment before using an actual check. Stub space is limited, so additional transactions can be omitted from the printout.
EXPLAIN BALANCES AND SETTLEMENTS
Payment and settlement statement previews
In Payments search, select the payment records to include, then open the payment statement preview. Choose Print For: Store or Entity: amount, paid, and balance values use the store's signs or the opposite entity perspective. Choose columns including transaction type and number, store, drawer, entity, client, method, reference, notes, amount, paid, balance, due date, and audit dates or users. Totals are shown for the selected monetary columns. Print or email the PDF, and save the column and copy defaults for this computer if useful.
A settlement statement is different: after applying a settlement, or from an existing settlement payment with applied rows, open the statement to show open balances settled, credits applied, amounts applied and remaining, and payment totals. Its sections and columns are fixed rather than controlled by the payment-list column checkboxes; the Store or Entity perspective can still be selected. Review the statement and its notes before sharing. Learn more in settling balances and applying credit.
DASHBOARDS & REPORTS
Use CASA analytics to answer different shop questions
CASA's desktop dashboards and reports help owners and authorized employees review sales performance, item movement, inventory value, collected taxes and fees, payroll, and technician labor. Each report is built for a different question: for example, Sales Overview highlights trends and mix, while Itemized Sales provides transaction-level physical-item detail.
The Open Dashboards employee permission controls access to the business dashboards and reports. Payroll has separate Payroll for Self and Payroll for All permissions: the first limits the employee to their own payroll view, while the second allows selecting employees. Employees with Payroll for All also have the self-view permission. Cost and profit information is further restricted by View Costs. See employee management and payroll permissions and employee compensation and payroll for setup details.
Reports commonly let you narrow results by date range and store; other filters depend on the report. Pay attention to what the selected dates represent: some reports use invoice completion, some use invoice dates, and time reports use the relevant clock-out time. This distinction helps reconcile numbers with the operational workflow being measured.
SEE THE SHAPE OF SALES
Sales Overview
Sales Overview combines several charts for the selected date range and optional store. The daily chart shows invoice payments by invoice date. The other sales breakdowns are based on completed invoices and help answer where revenue is coming from: by inventory type, by the complete set of classes on an item, by make, by salesperson, and across the inventory-category tree.
The salesperson chart separates standard, bulk, miscellaneous, and labor sales. If an invoice has both a primary and secondary salesperson, the line amount is divided equally between them for this analysis. The make chart highlights the top makes and compares revenue, cost, and profit; labor is excluded from that make comparison. Class grouping uses the entire class set assigned to the item, so multi-class inventory is not counted once for every individual class.
The category tree shows quantity, revenue, cost, and profit through category levels, with each value's share of its parent and of the overall total. The sunburst view visualizes the same category hierarchy and can be switched between quantity, revenue, and profit. Inventory-type selection applies to these category views. Sales Overview is a visual dashboard and does not provide a direct CSV export; use Itemized Sales when you need exportable transaction-level product sales.
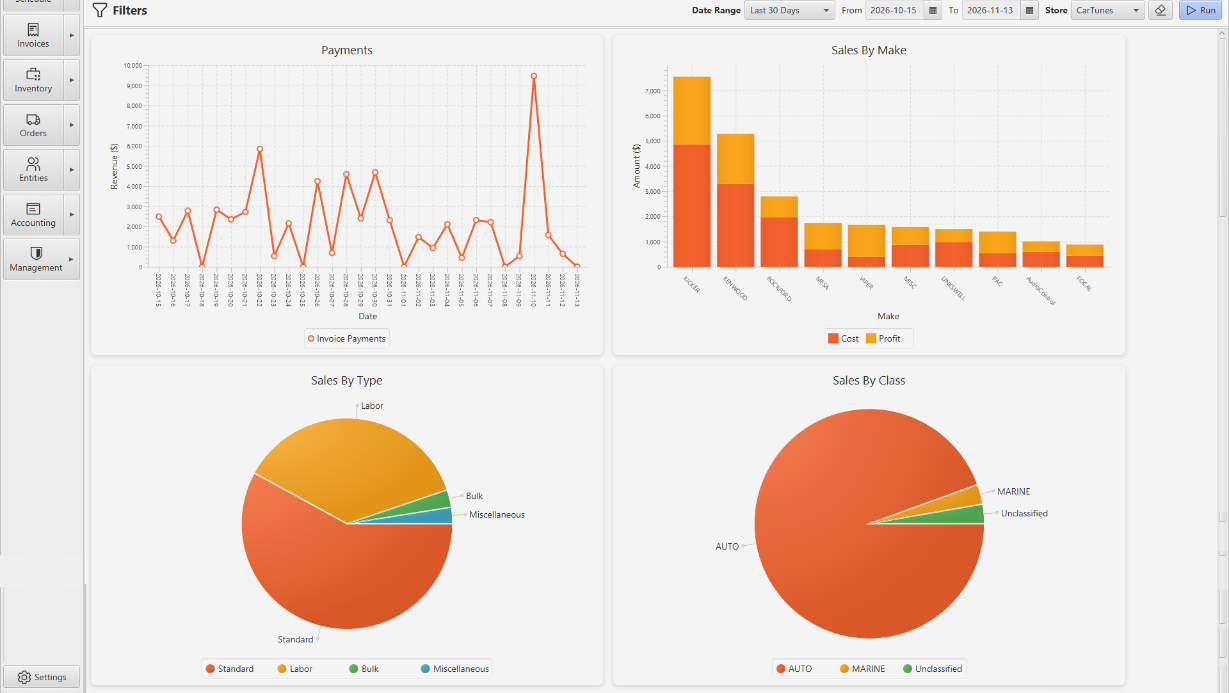
TRACE SALES TO THE PHYSICAL ITEM
Itemized Sales
Itemized Sales reports completed invoice lines that have a transacted physical item. It is useful for understanding what stock actually moved, including sold and returned items; estimates, uncommitted jobs, and invoice lines without a transacted item are not itemized physical sales records.
Each row connects the invoice and customer context (invoice number and type, store, date, client, and salespeople) to the item sold: its type, make, model, vendor model, serial number, description, item and inventory IDs, classes, categories, quantity, unit, sale price, sheet cost, and actual item cost. Filters can narrow the results by inventory details, vendor, category, salesperson role, or technician.
Standard serialized and non-serialized items represent one physical item per transaction; a return is shown with a negative quantity. Bulk item quantities use the quantity actually transacted. The report compares sheet-cost profit with profit based on the physical item's actual unit cost; sheet-cost values come from the invoice line, while actual cost comes from the item record. Users need View Costs permission to see cost and profit information.
Summary fields include sold and returned quantities, return rate, defective quantity and rate, revenue, sheet-cost value and profit/margin, actual-cost value and profit/margin, and average days to sale for positive-quantity non-labor/non-miscellaneous items. The days-to-sale measure uses the item's receipt date (or creation date when there is no shipment date) and the sale date. You can choose which summary fields to display, then export the filtered rows to CSV.
VALUE STOCK BY PHYSICAL QUANTITY
Inventory Value
Inventory Value groups physical items by inventory model and reports the quantity and value represented by those items. By default, it counts items in the Available status; choose other item statuses and inventory filters to answer a different stock question. The report shows actual item cost, sheet-cost value, and retail-price value, with totals for each measure and the number of result rows. Cost details require View Costs permission.
You can view current stock or choose a historical beginning- or end-of-day point. Historical quantity, status, and store are reconstructed from item history, so a store filter reflects where the item was at that point—not necessarily its current store. The historical view does not recreate old prices: it values the historical quantity using the item's recorded unit cost and the inventory model's current sheet cost and retail price. Export the resulting table to CSV for further analysis.
REVIEW CHARGES ON COMPLETED SALES
Tax & Fees Collected
This report summarizes tax and fee amounts recorded on completed invoices. Filter by completion-date range, optional store, and whether to include taxes, fees, or both. The results can be reviewed as a tax/fee-to-year-to-month hierarchy or grouped by store, then tax/fee and month. Each underlying record identifies the charge type and name, store, year, month, collected amount, and quantity; the report also shows the total collected amount.
These are the tax and fee amounts recorded with the invoice, not a recalculation using today's tax setup. Use the report's CSV export to save the matching monthly records with their charge, store, period, and collected amount for reconciliation.
REVIEW HOURS, SALES COMMISSION, AND COMPENSATION
Payroll
The Payroll dashboard combines employee time logs and sales commission for the selected employee, date range, and optional store. Time-log rows represent closed clock-in/clock-out shifts and include the employee and store, original and adjusted in/out times, comments, adjustment, adjusted hours, and week totals. The report uses the clock-out time for its date range and groups weekly hours by Sunday-starting week.
Payroll summaries show standard, overtime, and total hours; wages; commission; total compensation; and effective hourly compensation. Standard and overtime hours are calculated against the employee's overtime threshold, and hourly wages use the employee's rate and overtime multiplier. Salaried employees' hours are still reported, while wages are calculated from salary rather than hourly totals. Commission summaries can also show primary- and secondary-sales totals and profit, commission converted to hours for hourly employees, and standard hours plus commission hours. Commission totals depend on the selected commission basis, rates, inventory types, and sheet-cost source; the report allows compensation parameters to be adjusted for the calculation. Profit details require View Costs permission.
Commission rows tie completed invoice lines to the employee's primary or secondary salesperson role and include invoice/date/store, salespeople, make/model/type, quantity, sheet cost, sale price, line total, profit, applied rate, commission, and whether the line is excluded. You can review or exclude eligible lines and export commission rows to CSV. Time-log CSV exports include original/current times, comments, adjustments, adjusted hours, and weekly totals. Payroll for Self limits the employee selector to the signed-in employee; Payroll for All permits reviewing other employees as well.
COMPARE ESTIMATED LABOR WITH RECORDED WORK
Technician Time
Technician Time is different from employee clock-in/clock-out payroll: it reports labor time recorded against invoice labor lines. Each log connects the invoice, customer, store, salespeople, vehicle, labor line, and technician with the original and current start/end times, comments, override state, actual hours, and expected hours. The date range is based on the labor log's time-out. Deleted labor lines are excluded by default, with an option to include them for historical review.
Expected hours come from the labor line's configured job hours multiplied by its quantity. Summary totals compare expected hours with actual logged hours and show the difference and percentage, labor revenue, expected and actual revenue per hour, and the difference between those rates. Revenue and expected hours are counted once per labor line even when multiple technician logs are attached; actual hours sum the individual logs. The report can be exported to CSV with invoice, vehicle, labor-line, technician, time, and hours details.
TAKE THE DATA FURTHER
Export reports and search results to CSV
CSV export makes it easy to analyze CASA data in a spreadsheet or another tool. Many report tables and search screens provide an Export to CSV action for the rows that match the current search. For standard table exports, the exported columns follow the columns currently visible in the table, so apply your filters and choose the fields you need before exporting. Some reports use a dedicated export with a fixed set of report-specific columns.
Not every view is a table: Sales Overview is chart-based and has no direct CSV action. For exportable detail behind product sales, use Itemized Sales; for time and financial detail, use the relevant Payroll or Technician Time report. CSV is intended to make records easier to analyze—not to replace the permissions, date definitions, or calculation rules of the report that produced them.
USER INTERFACE (UI/UX)
Desktop home and navigation
The desktop home screen keeps the shop's main workflows close at hand. Use the left-side buttons to open Schedule, Invoices, Inventory, Orders, Entities, Accounting, Management, and Settings. Expand a button's menu for related actions, such as a new invoice, browsing items, a new purchase or return order, or a management report. Screens open in tabs so you can switch between tasks.
The top bar provides login/logout and Clock In/Out; expand the clock menu to see who is currently clocked in and when. A configured cash drawer can be popped from the toolbar by an employee with permission. Light and dark mode buttons change the desktop appearance. When the CASA Messaging add-on is enabled, the Chat toggle shows or hides the messaging pane.
FIND RECORDS WITHOUT LEAVING YOUR WORK
Desktop quick searches
Use the top-bar model search to find and open inventory: suggestions show the model and available quantity. Enter a model or scan a UPC into the field and press Enter to open a matching record. The entity search suggests records by name or phone number and displays their names and phone numbers; select a suggestion to open the entity. Name suggestions begin after three characters, and phone suggestions after at least five digits.
Enter an invoice number or a purchase, return, or transfer order number in its quick-search field and press Enter to open that record. The clear button clears the quick-search fields.
ARRANGE YOUR WORKSPACE
Tabs, split view, and windows
Right-click a desktop tab to close it, close all or other tabs, or close tabs to its left or right. The tab menu can also move a tab between the main and secondary panes; moving to the secondary pane opens a left-and-right split if needed. Close actions may ask you to address unsaved work.
Right-click the workspace's split-pane area for Split Left & Right, Split Top & Bottom, or Unsplit, so you can compare two tasks side by side or one above the other. From a tab's own menu, choose Detach to New Window to work in a separate window; a detached tab offers Reattach to Main Window.
MAKE TABLES WORK FOR YOU
Sorting and customizing desktop tables
Click a sortable column header to sort rows; click again to change the sort direction. You can also drag column headers to rearrange columns in desktop tables and tree tables. This column order is temporary and is not saved across sessions.
Many tables have a table menu button at the edge of the column headers. Its custom menu lets you show or hide individual columns, Show all or Hide all, and toggle Fit Columns to Width to fit the table or allow unconstrained column widths. Where Save as Default is offered, use it to save column visibility and the fit setting for that table on this device. It does not save the dragged column order.
Line tables behave differently from ordinary search results: on desktop, invoice lines and purchase, return, and transfer order rows can be dragged into a preferred order. When saving an editable invoice or order draft, the current row order is saved—even if it resulted from clicking a column header to sort. Sort a purchase order by Vendor Model or Make to organize it quickly, but review the resulting order before saving. A committed order's lines are locked; a temporary sort or drag there does not mean the line order has been saved.
WORK FASTER WITH A KEYBOARD
Desktop keyboard shortcuts
From the main desktop window, F1 logs in or out, F2 opens Clock In/Out, and F3 pops the configured drawer when permitted. F4–F7 focus the model, entity, invoice, and order quick searches respectively; F8 clears them. F9 selects light mode, F10 dark mode, and F11 toggles the Chat pane when available. Alt+1 opens Schedule; Alt+2–7 opens the Invoices, Inventory, Orders, Entities, Accounting, and Management menus; Alt+8 opens Settings.
Other shortcuts depend on the active screen: Ctrl+S saves in many editors, including invoices, inventory, entities, packages, and orders. In the invoice editor, Ctrl+P opens print and Ctrl+R refreshes; on invoice search, Ctrl+Enter searches and Ctrl+N opens a new invoice. Ctrl+Enter also sends from the Chat message editor. Escape can dismiss a pop-up or cancel an edit where supported, but behavior varies by control: some bulk-edit table cells use Escape to commit the entered value. Check the screen's instructions before relying on a shortcut.
CASA ON THE SHOP FLOOR
Android interface and capabilities
On Android, use the navigation drawer on a phone or the navigation rail on a wider tablet to switch between Schedule, Invoices, Inventory, Orders, Entities, Accounting, Settings, and Chat when licensed. Login/logout and Clock In/Out are available in navigation. Device settings select an existing default store and cash drawer, and can use light, dark, or system appearance; applicable permissions still control access and changes.
Android supports everyday workflows such as viewing the schedule, creating and managing invoices, working with inventory and entities, and creating purchase, return, and transfer orders. Purchase and transfer receipts have manual and scanner workflows; invoice entry can use the device camera to scan UPCs and VINs. Accounting includes payment search, totals, and miscellaneous payments. Available actions depend on permissions, device setup, and subscriptions; see the individual guide sections for workflow details.
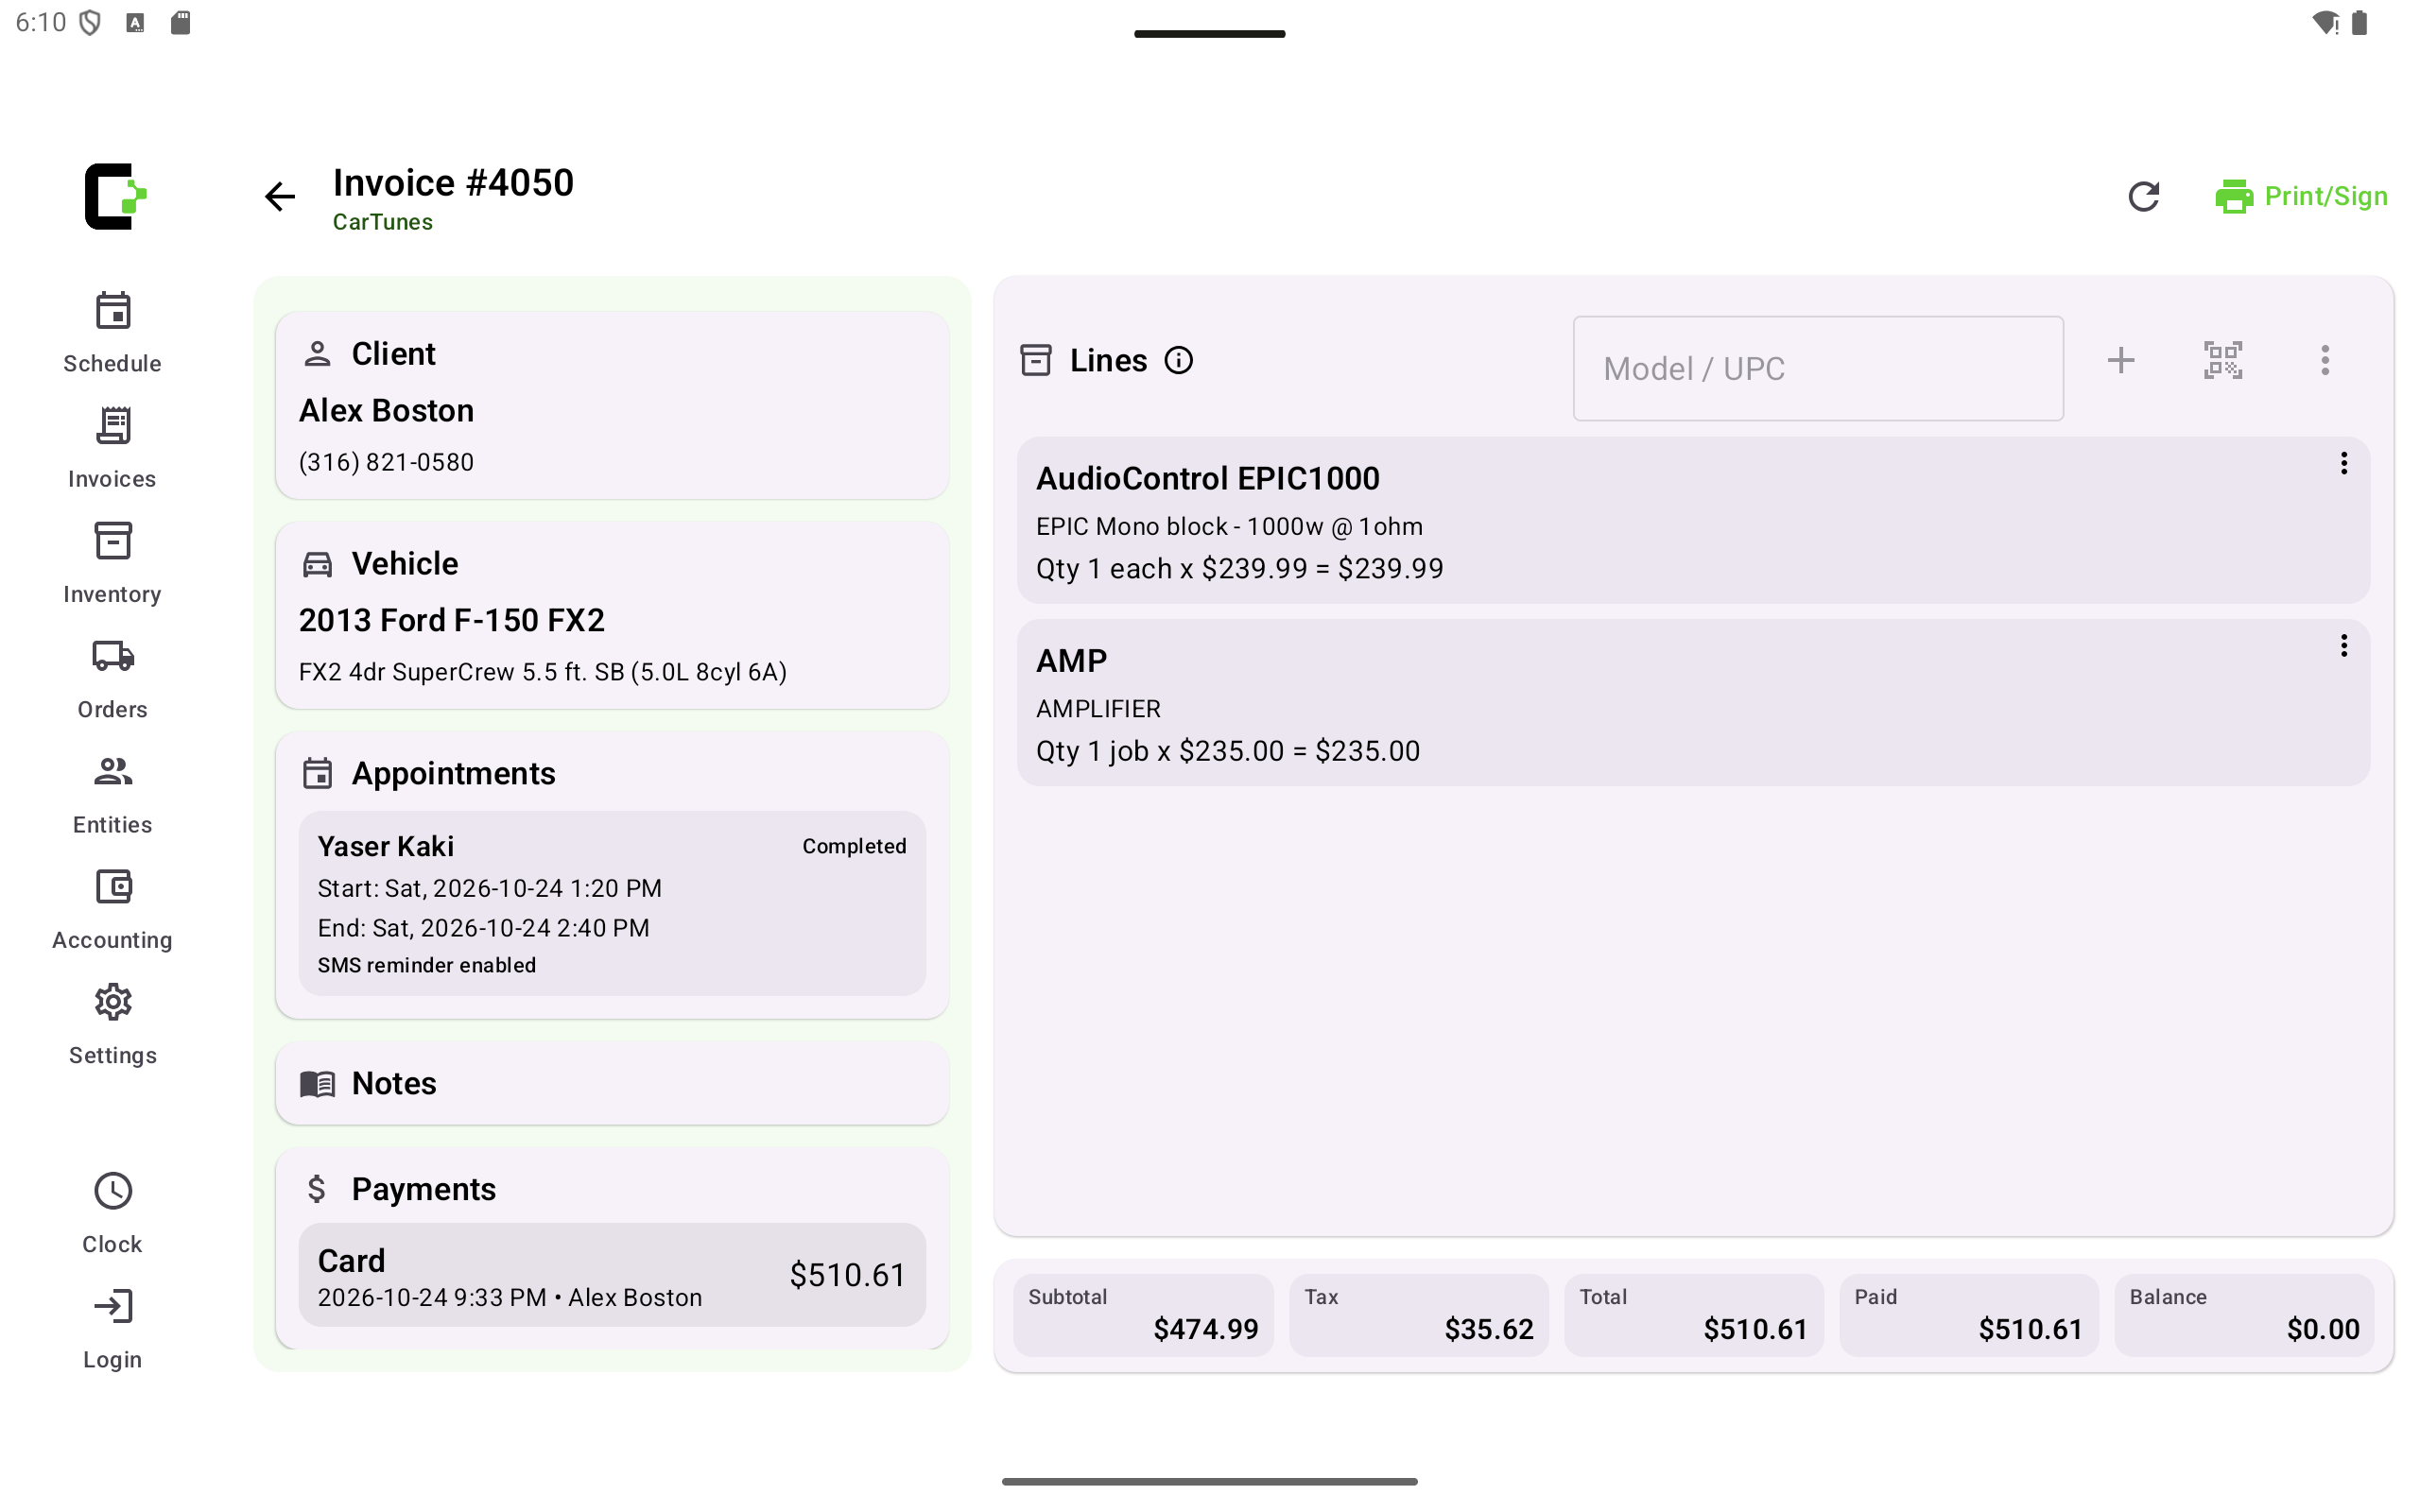
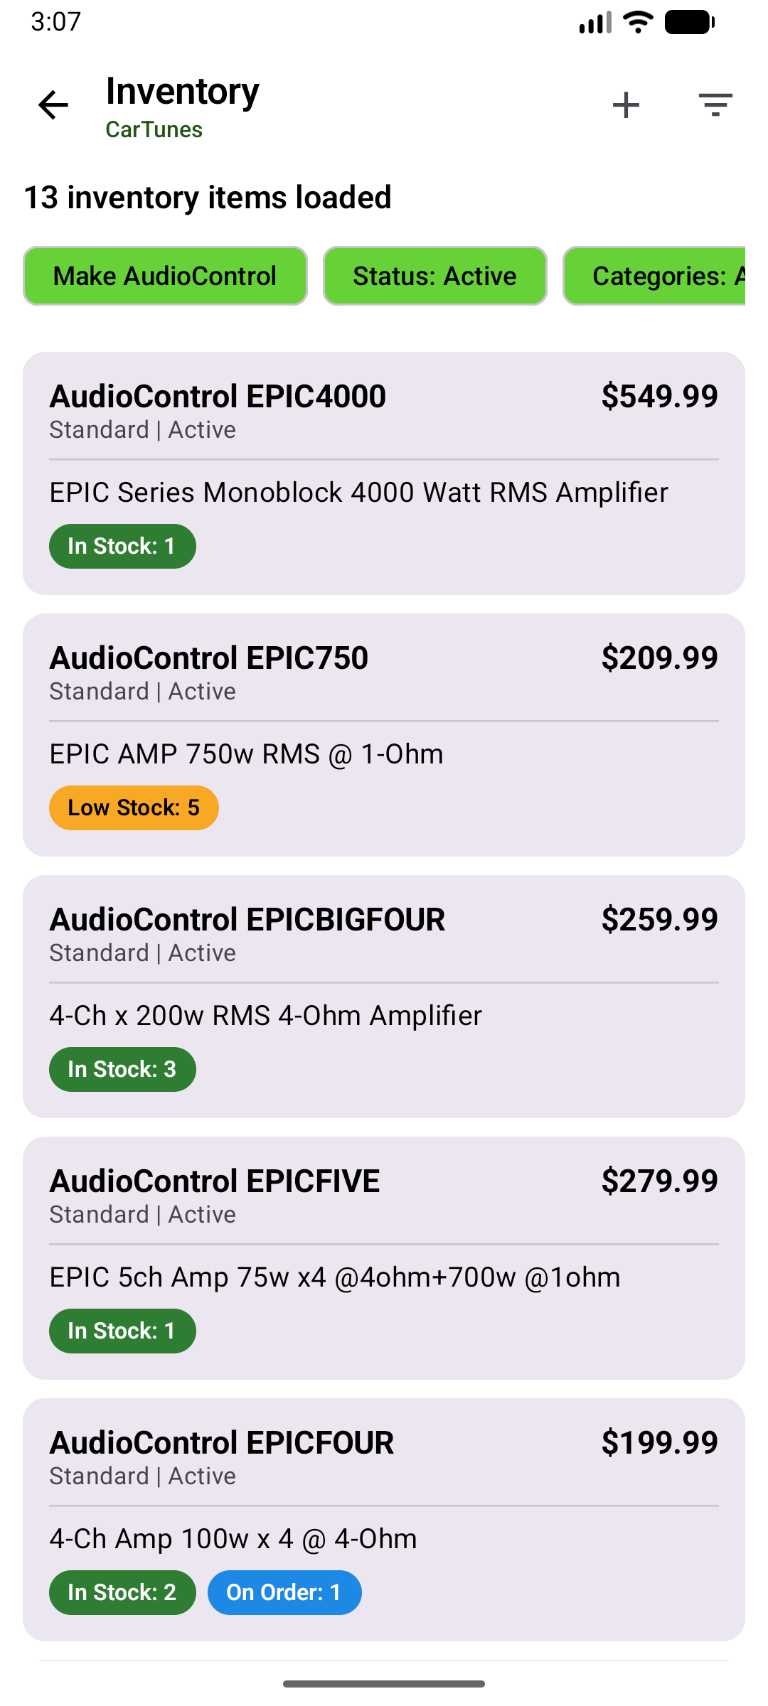
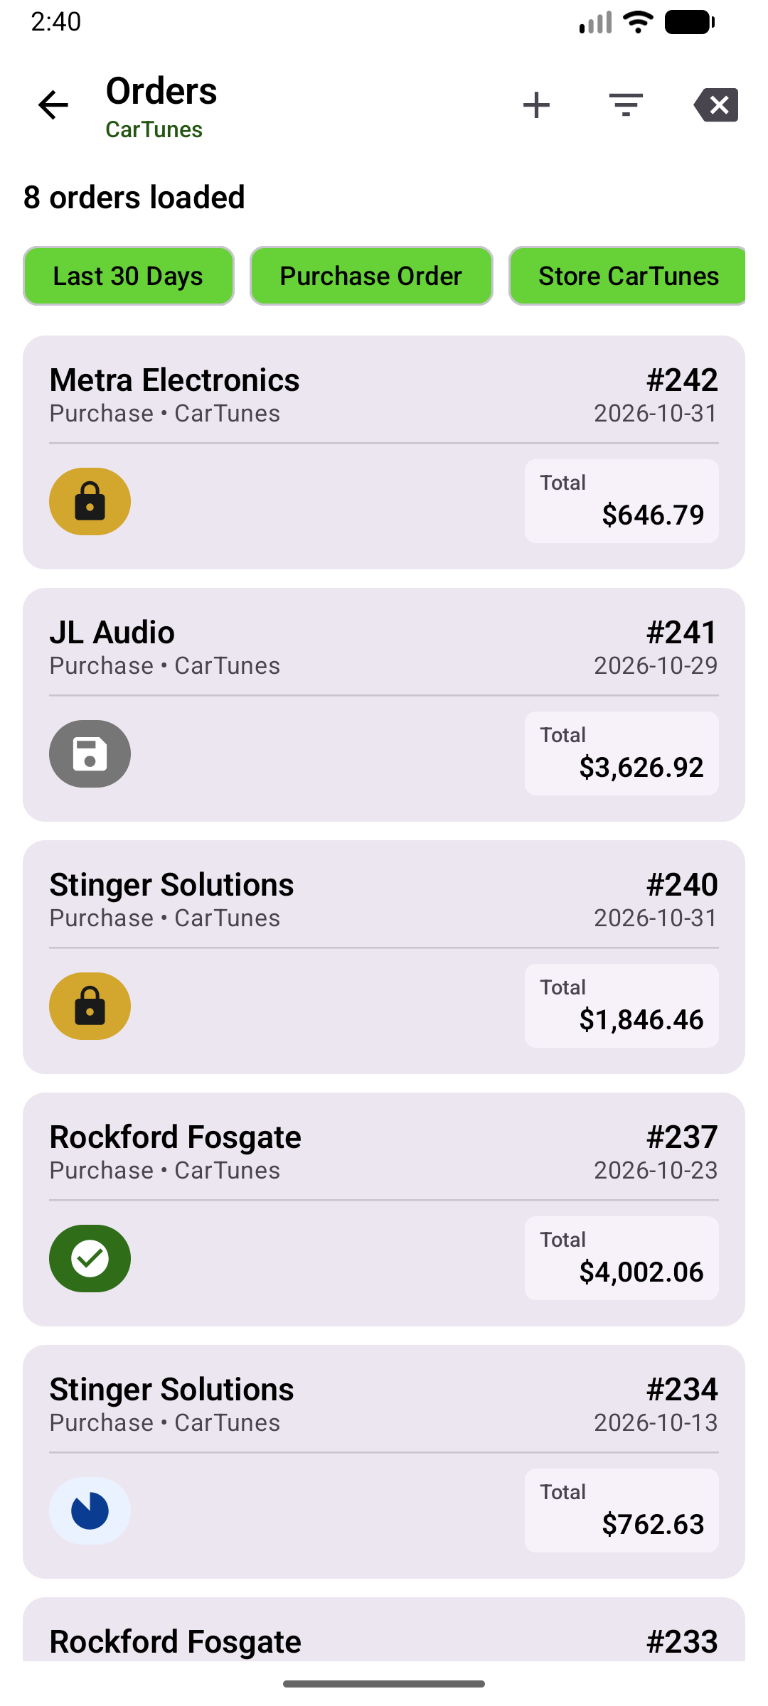
Android is not a complete replacement for desktop administration. It cannot create or edit stores, employees, taxes/fees, or cash drawers; use desktop for those records. Android payment search does not offer the desktop workflow for editing an existing payment, and editing recurrence on an existing recurring calendar event is not available on Android. The desktop tab, split-view, detached-window, and keyboard features described above are desktop-specific.
See CASA in your shop
Have a question about a workflow or want to see it in action?